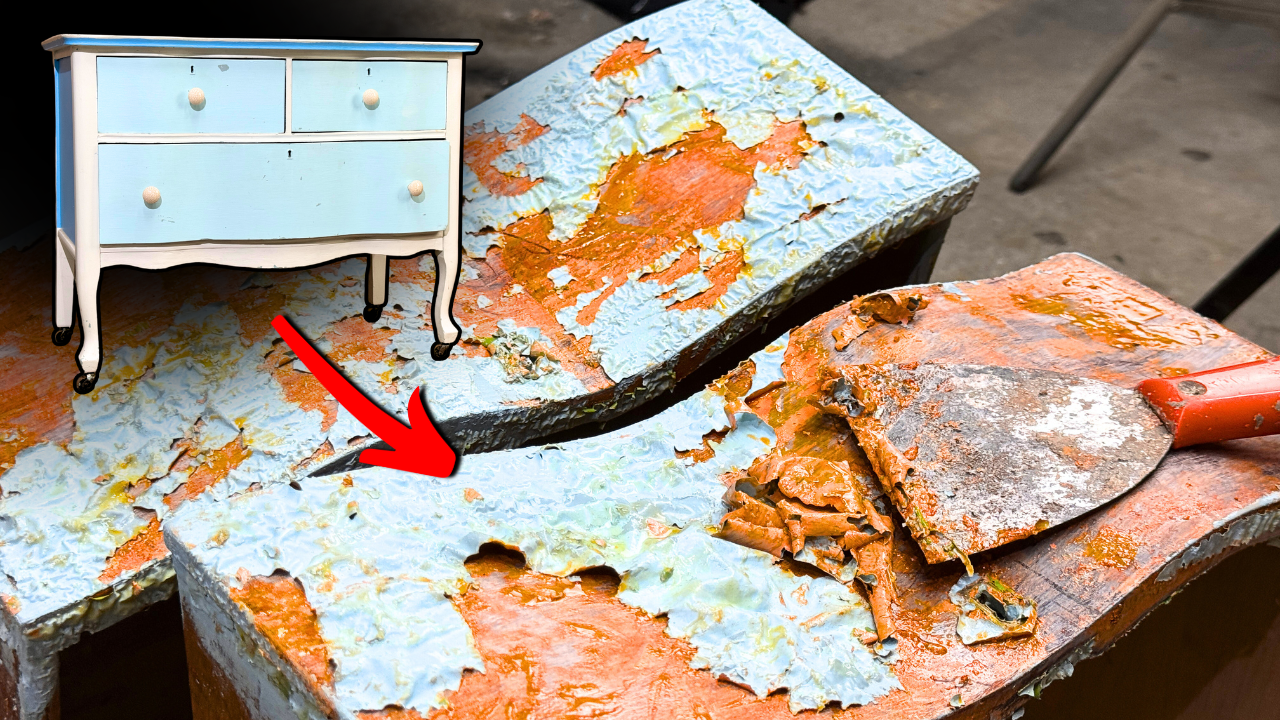
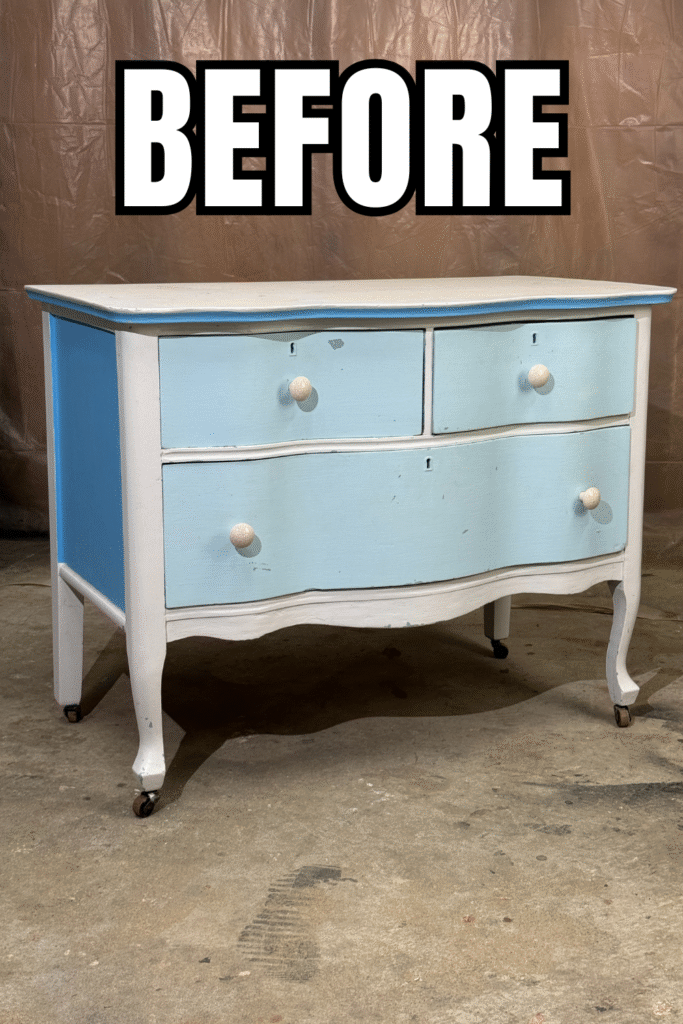
This serpentine-front antique dresser was… a mess.
Layers of thick paint, mystery red gunk, and scratches everywhere. But under all of that, I knew there was beautiful wood waiting to be brought back to life.
This project was a full strip-down, sand, stain, and seal job, with a few repairs along the way. Here’s how it went.
Getting It Started
First, I ran a quick lead test on the paint (always a must before stripping). Thankfully, it came back clear, which meant I could safely move forward without special lead protocols.
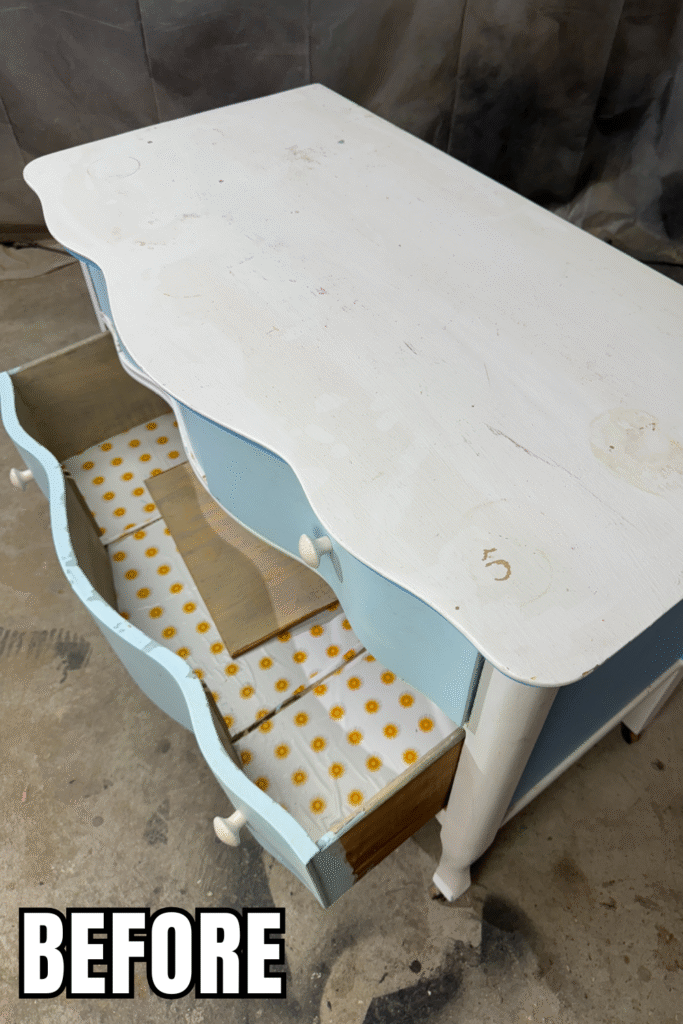
Next, I removed the old knobs and started pulling out the ancient drawer liners. These liners had seen better days, yellowed, brittle, and smelling like they’d been there for decades. They had to go…
Step 1: Paint Stripping
The white paint on the top came off surprisingly easy… The drawers? Not so much.
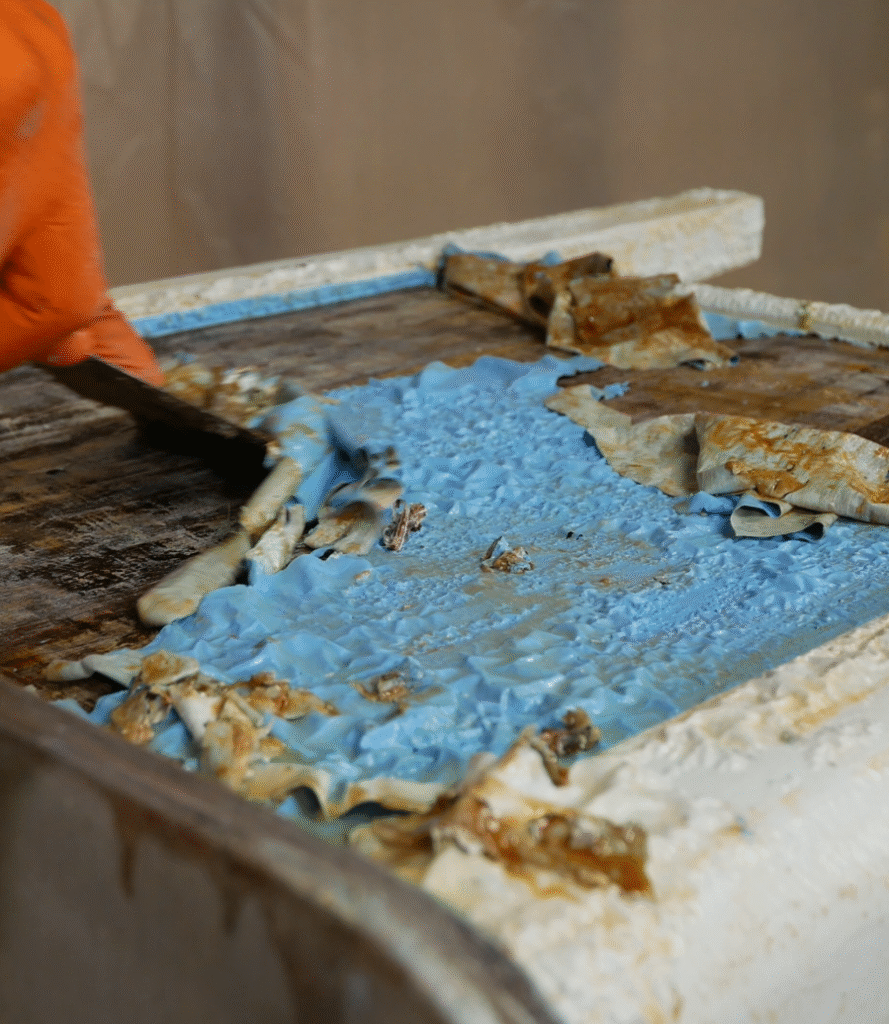
Underneath the blue paint on the drawer fronts was a strange red material, likely an old red mahogany stain or dye, that turned into a messy paste when the stripper hit it. Add in a stubborn primer layer, and this became one of the messiest strip jobs I’ve done.
The sides were a bit easier, just blue paint without the red nightmare underneath, but scratches covered the entire piece and would need a good amount of sanding.
To clean off the stripper residue, I used mineral spirits, a wire brush, steel wool, and plenty of rags. Oh, and I had to strip the inside of every drawer because they were painted too. Whatever that paint was, it melted my nitrile gloves almost instantly… not fun.
Step 2: Sanding
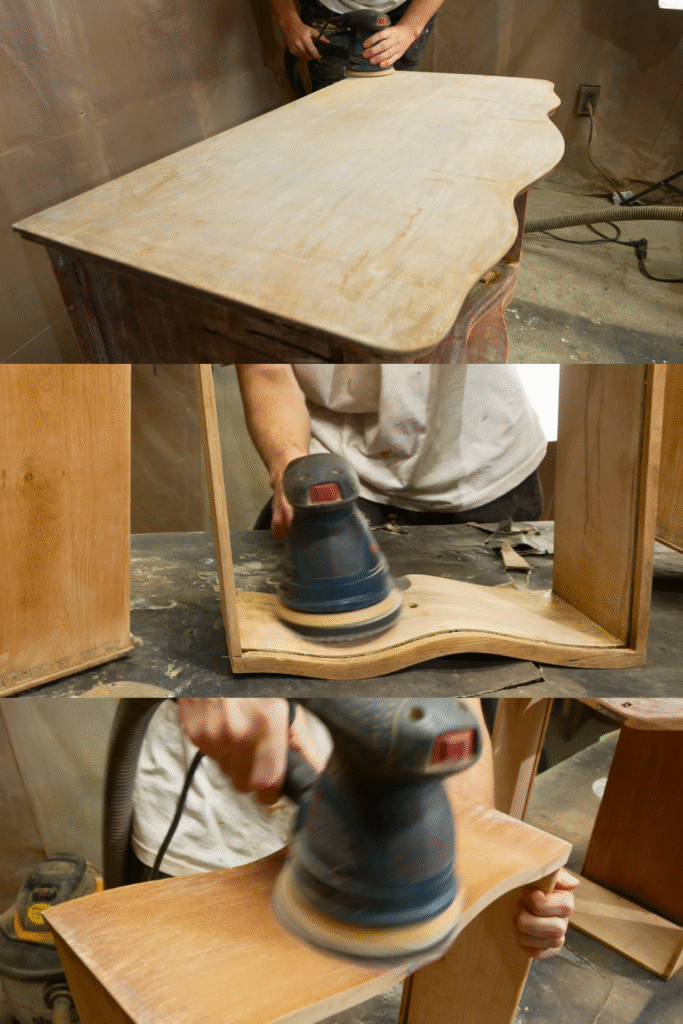
Once everything was fully dry, I sanded the dresser inside and out. I started with 80 grit 3m sanding mesh to remove deep scratches and worked my way up to 220 grit for a smooth finish.
Some areas still had that red stain embedded deep in the wood grain. I sanded aggressively, but it wouldn’t budge completely, something I’d have to disguise later during staining.
Step 3: Oxalic Acid Stain Removal Attempt
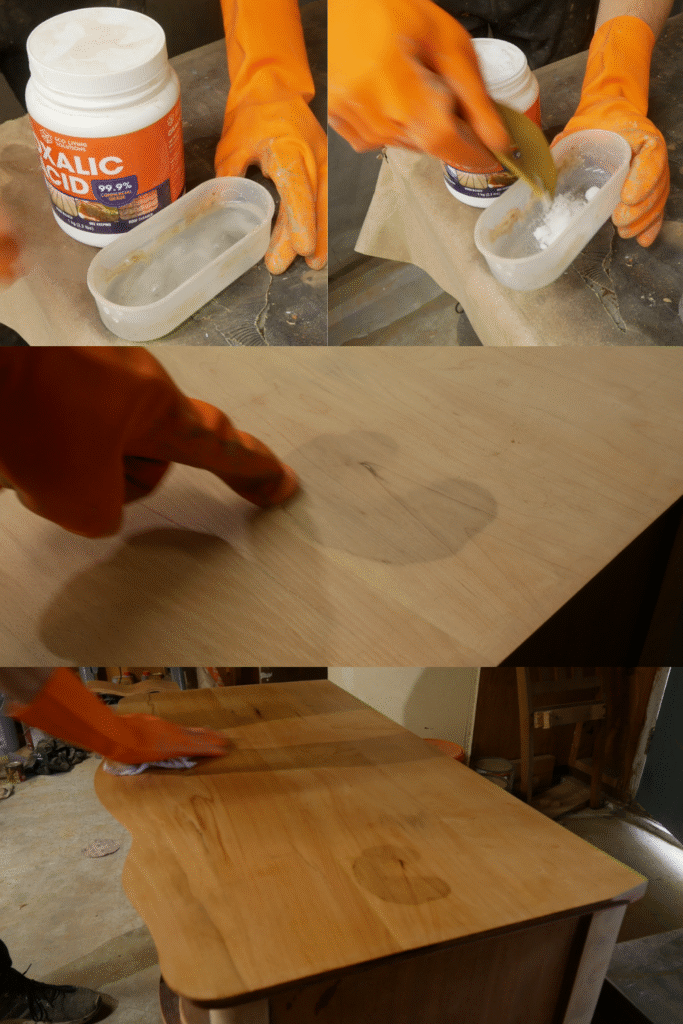
On the top surface, there was a dark stain. I tried oxalic acid to bleach it out. It lightened slightly but didn’t disappear entirely. Since it was still visible, my plan was to use a darker stain to help hide it.
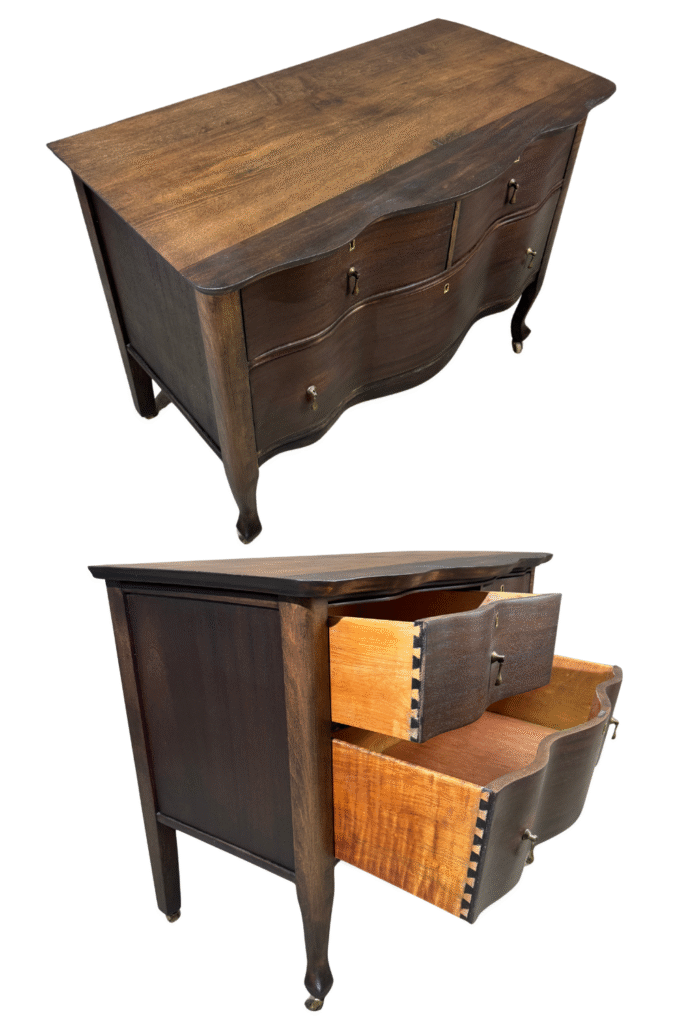
Step 4: Veneer Patch & Repairs
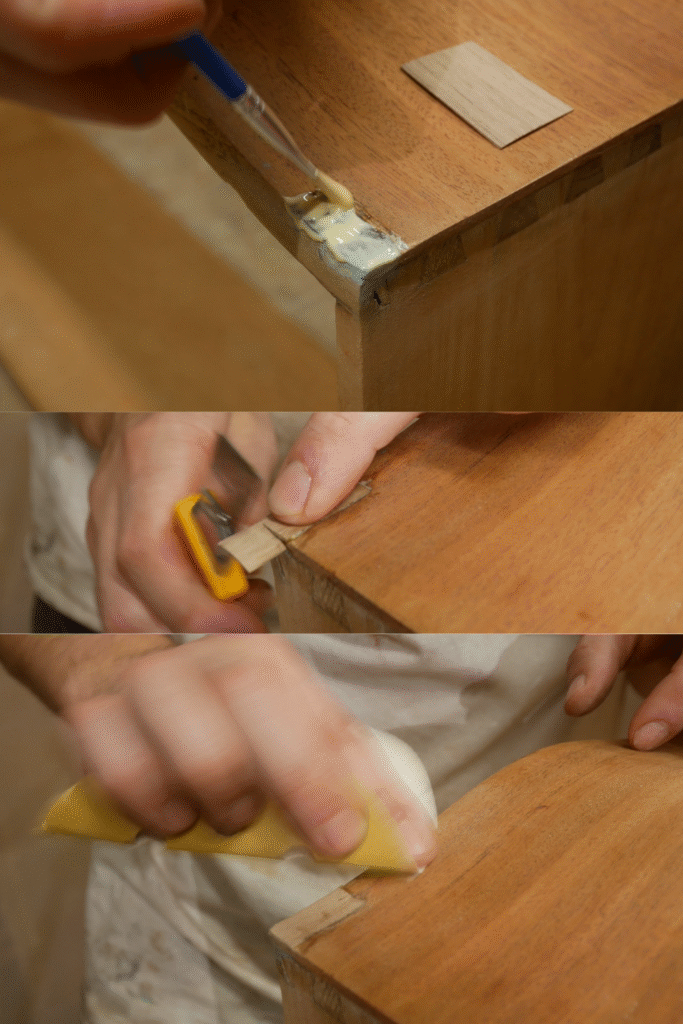
One of the drawer faces had a missing piece of veneer, so I patched it with a new section, glued it in place, and sanded it flush. I also took this time to glue any other loose veneer or structural damage I spotted.
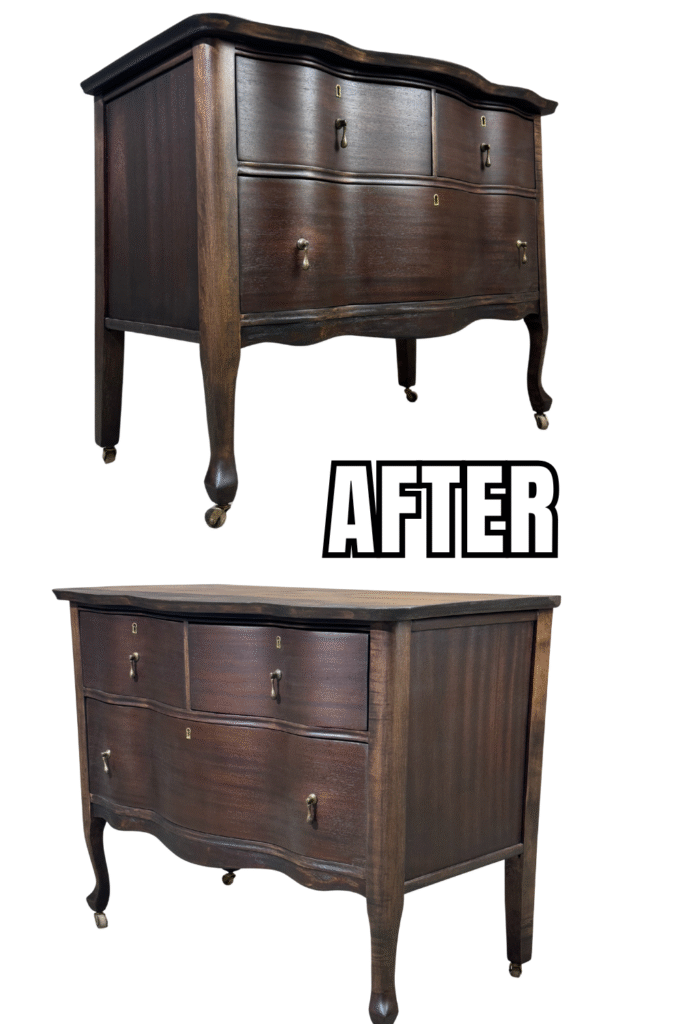
Step 5: Staining with Kona Gel Stain
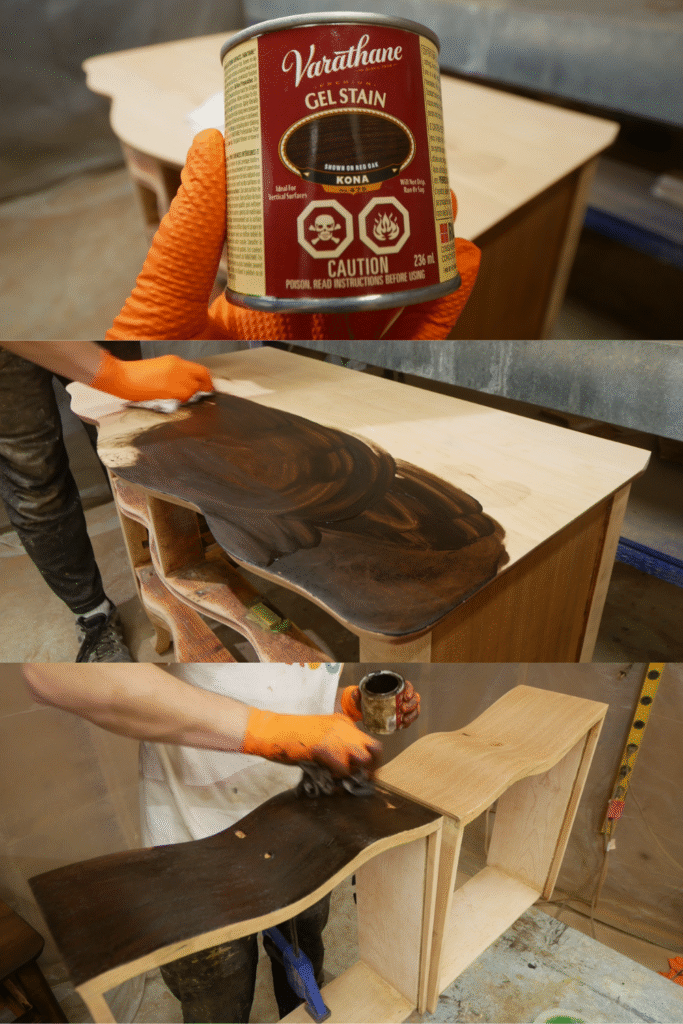
For the finish color, I chose Kona Gel Stain, a deep, rich brown. This not only complemented the dresser’s vintage look but also helped conceal the stubborn top stain and any remaining imperfections from the red stains throughout.
I applied it with a rag: wipe on, then wipe off the excess for an even, smooth looking finish.
Step 6: Sealing with Spray Lacquer
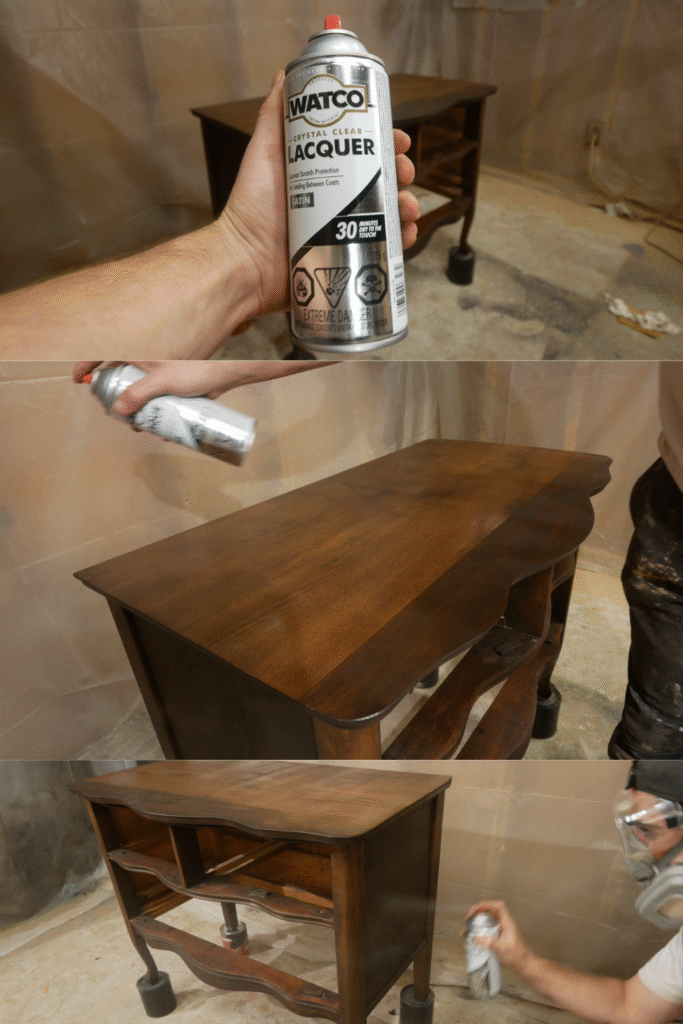
To lock in the stain and give the piece a durable, classic sheen, I applied several coats of spray lacquer. This brought out the depth of the wood grain without creating a heavy plastic-like layer.
Step 7: Gilding Wax on the Casters
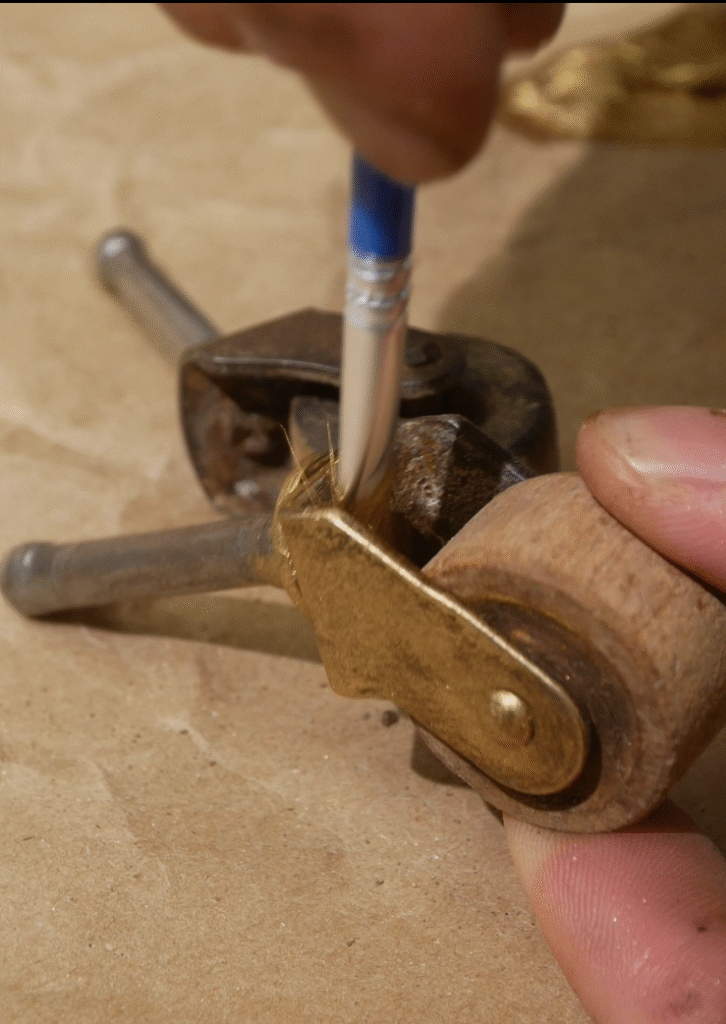
The original antique casters were in great shape but needed a refresh. I used gold gilding wax on the metal hardware and lightly sanded the wooden wheels to clean them up. This small detail gave the dresser that extra touch of character.
The Final Reveal
🎥 Watch the Full Restoration on YouTube
See every messy, satisfying step of this restoration here: Removing GROSS Paint from a Serpentine Dresser | Antique Furniture Restoration
🛠️ Products Used in This Restoration
(Includes affiliate links)
Watco Lacquer Spray – Durable spray finish for a smooth, protective coat
Lead Test Kit – Always test before stripping old paint
Bahco Carbide Scraper – My go-to for tough paint and finish removal
BOSCH Random Orbital Sander – Powerful and consistent for surface prep
Scotch Brite Pad – Great for applying finishes or scuffing between coats
Titebond II Wood Glue – Reliable glue for veneer and repair work
Olfa Utility Knife – Perfect for trimming veneer patches cleanly
Kona Varathane Gel Stain – Deep, rich tone that hides imperfections beautifully
Scraper Tool Set – Detail scrapers for tight spots and curved edges
3M Sanding Mesh – Reusable and great for between-coat sanding
Sand Paper (Various Grits) – 100 to 220 grit for prepping and smoothing surfaces
3M Performance Paint Project Respirator – Essential safety when stripping and sanding
Foam Sanding Pad – Flexible sanding for contoured areas
Circa 1850 Stripper – Heavy-duty paint remover (available at Home Hardware)
From a scratched-up, paint-caked piece to a rich, dark-stained antique, this serpentine dresser is ready for another century of use. This was one of those restorations that reminded me: the messiest projects often have the most rewarding transformations! Thanks for tuning into another Project by Jamie 🙂

