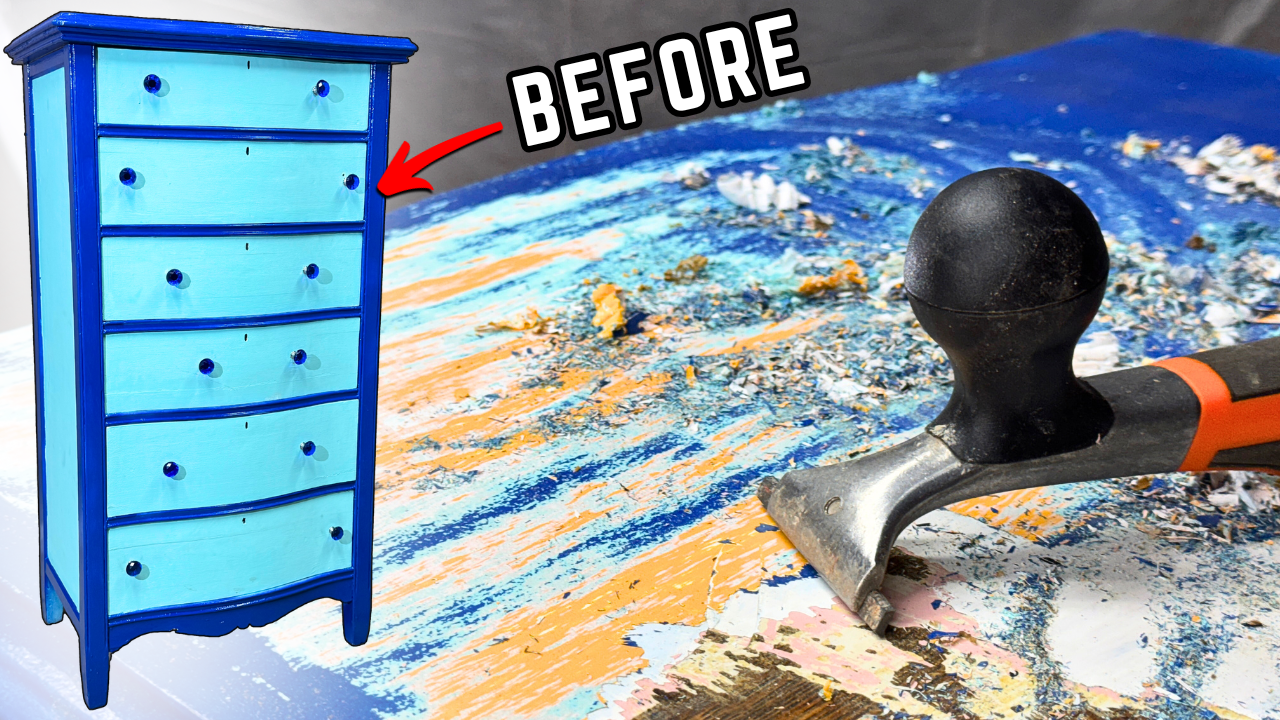
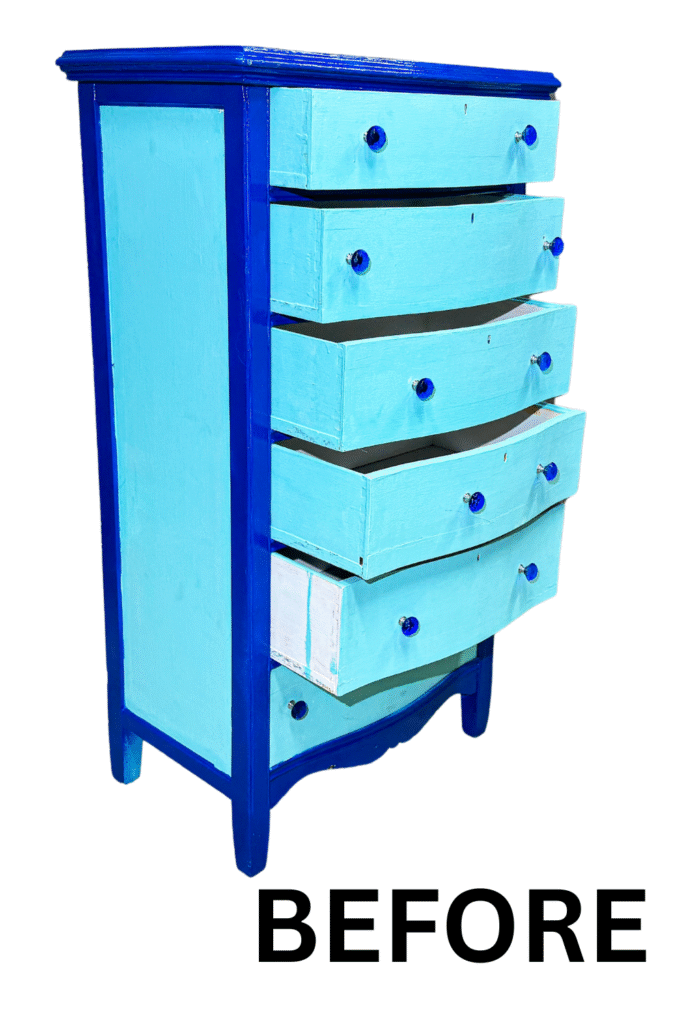
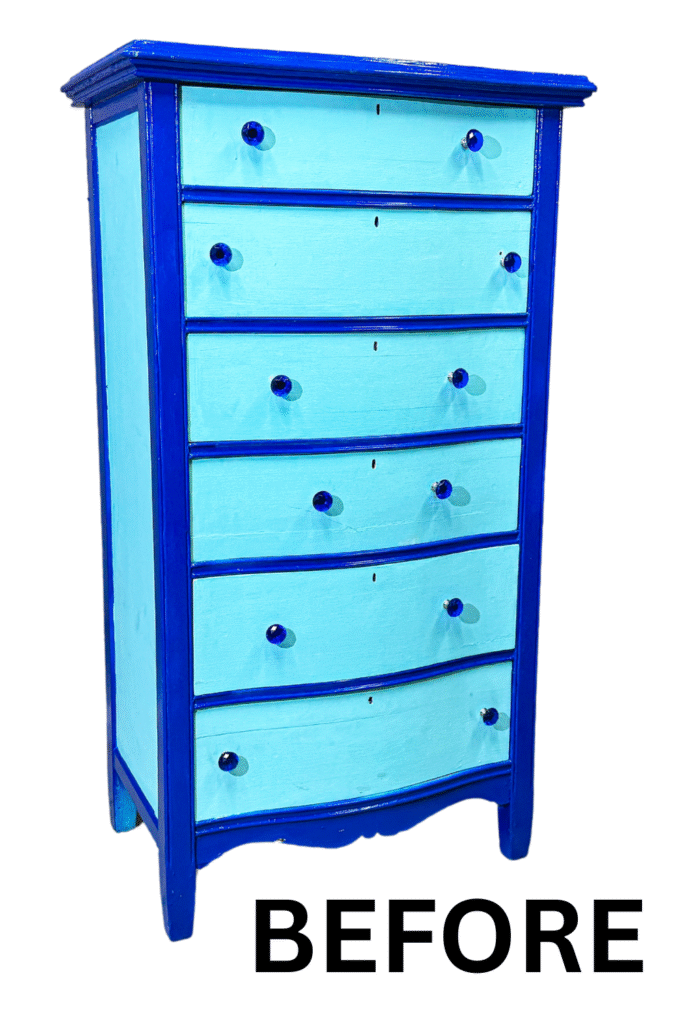
This might be one of the worst painted pieces I’ve ever worked on.
I found this antique six-drawer chest of drawers on Craigslist. For some crazy reason, I paid $100 for it, yeah, I know. But I couldn’t shake the thought that if I didn’t grab it, the piece would likely find the trash sooner rather than later. So I hopped in the truck and picked it up about 30 minutes from my place.
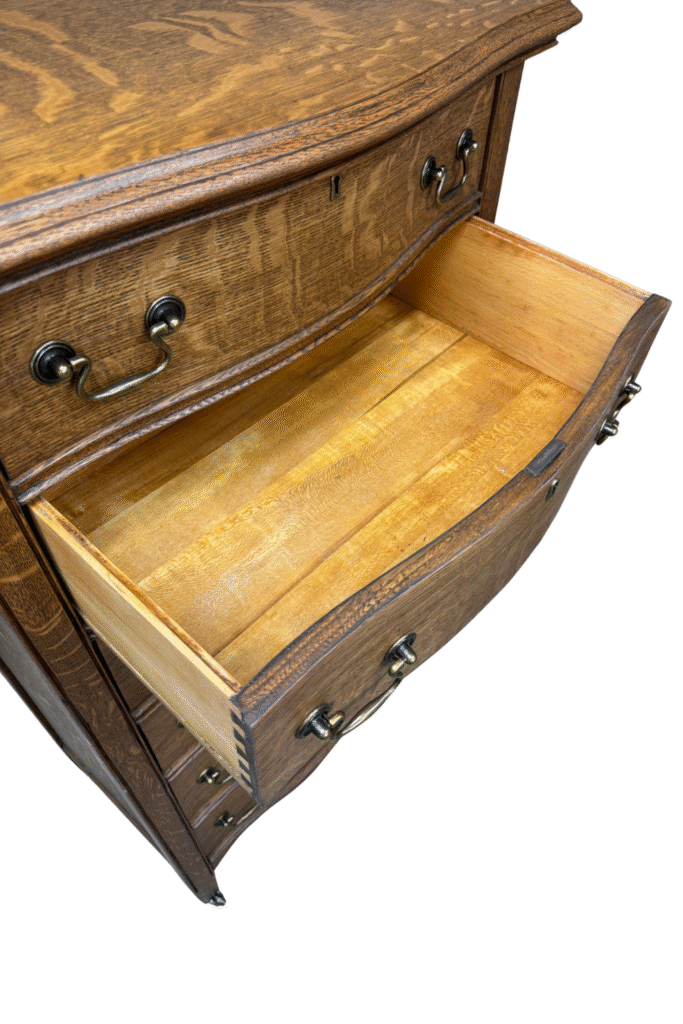
Inside one drawer, I found a maker’s sticker with the year option left blank. It read “190X,” which means this chest was most likely built sometime between 1900 and 1909. That little detail gave me extra motivation to bring it back to life.
So… let’s get things started.
Part 1: Getting Started / Prep Work

The first challenge? Just pulling out the drawers. Some slid out fine, but the bottom one didn’t want to budge at all. Eventually, I got them all free and began scraping through the paint layers for a lead test. With around eight coats, it could’ve gone either way, but thankfully it tested negative for lead, huge relief.
With that out of the way, it was time to face the mountain of paint.
Part 2: Paint Scraping with a Carbide Scraper
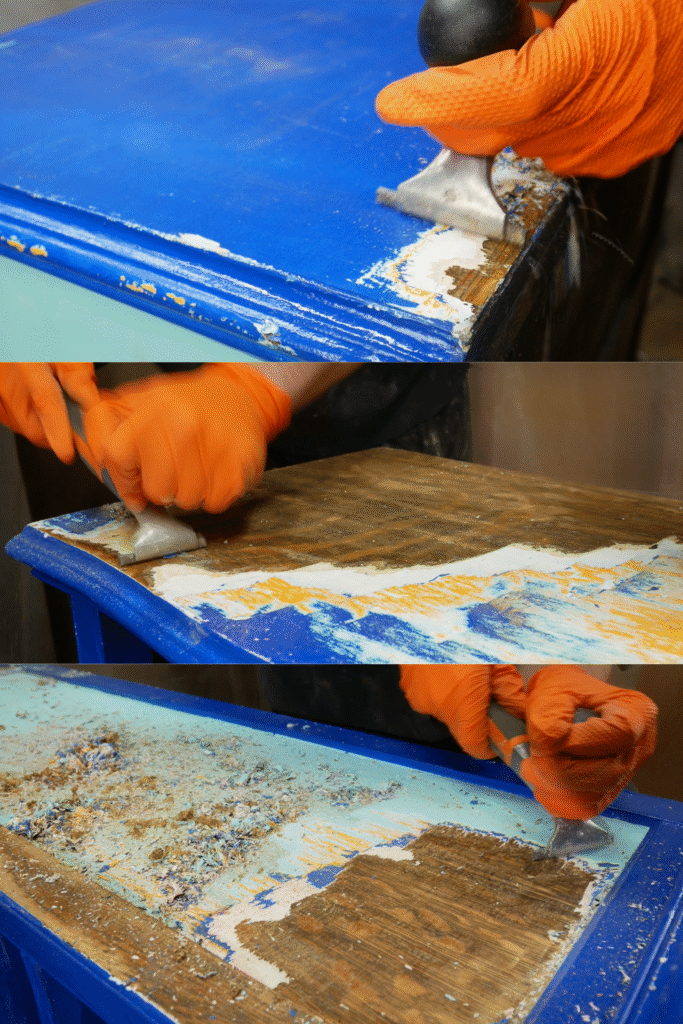
I decided against wasting gallons of stripper right away. With so many layers, stripper would only take off one or two at a time, and that would cost a fortune. Instead, I started with my Bahco carbide scraper.
On the flat surfaces, the carbide blade ripped through multiple coats in each stroke. For the detailed trim, I swapped to a contour scraper blade that fit the rounded edges. The corners and tight spots, I used a small picking tool, similar to a dental pick, to dig out stubborn paint.
This was days of hard, physical scraping. My YouTube video shows much of the process, but typing it out doesn’t fully capture how exhausting it was. Top, sides, drawer faces, insides of drawers… everything had to be scraped.
Part 3: Out Came the Paint Stripper
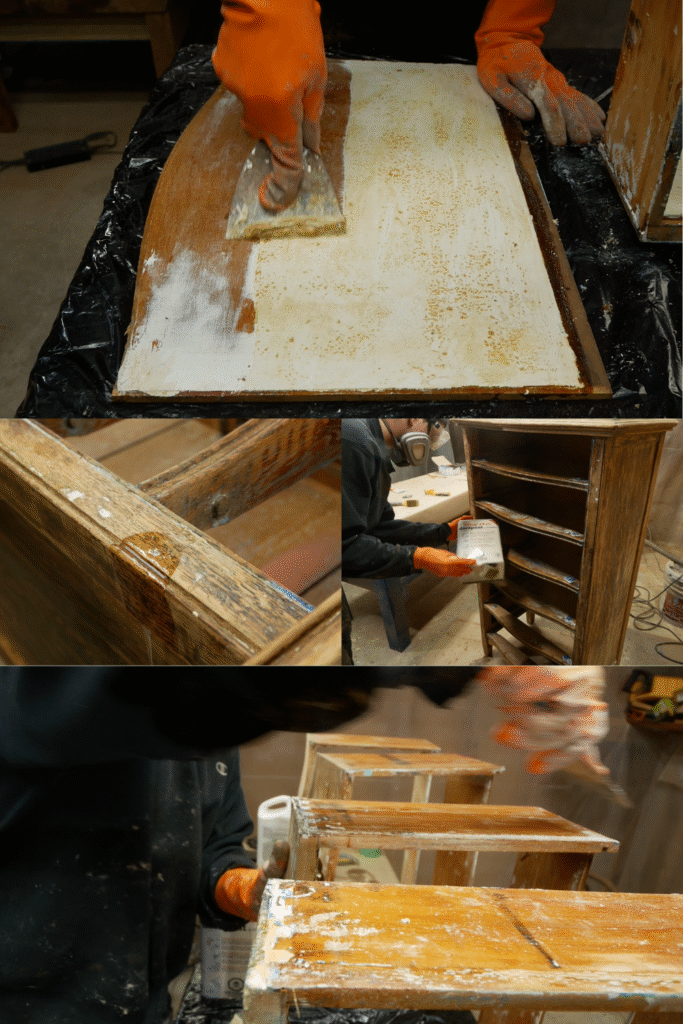
Eventually, scraping alone wasn’t enough. I turned to paint stripper to help with the areas that were just too stubborn:
-
Drawer joinery and inside corners where the scraper really couldn’t reach.
-
Detailed U-shaped trim where the paint was buried in grooves.
-
Drawer bottoms, since scraping them caused the thin panels to flex and scratched instead.
A mix of stripper, wire brushes, and plenty of rags got me through these spots.
Part 4: Initial Sanding
With most of the paint gone, I started sanding to clean off any remaining paint and old finish. I used 120-grit sanding mesh, this stuff lasts longer than traditional sandpaper and worked well across the large surfaces.
This step evened everything out and prepped the chest for repairs and veneer work.
Part 5: Filling Drawer Holes
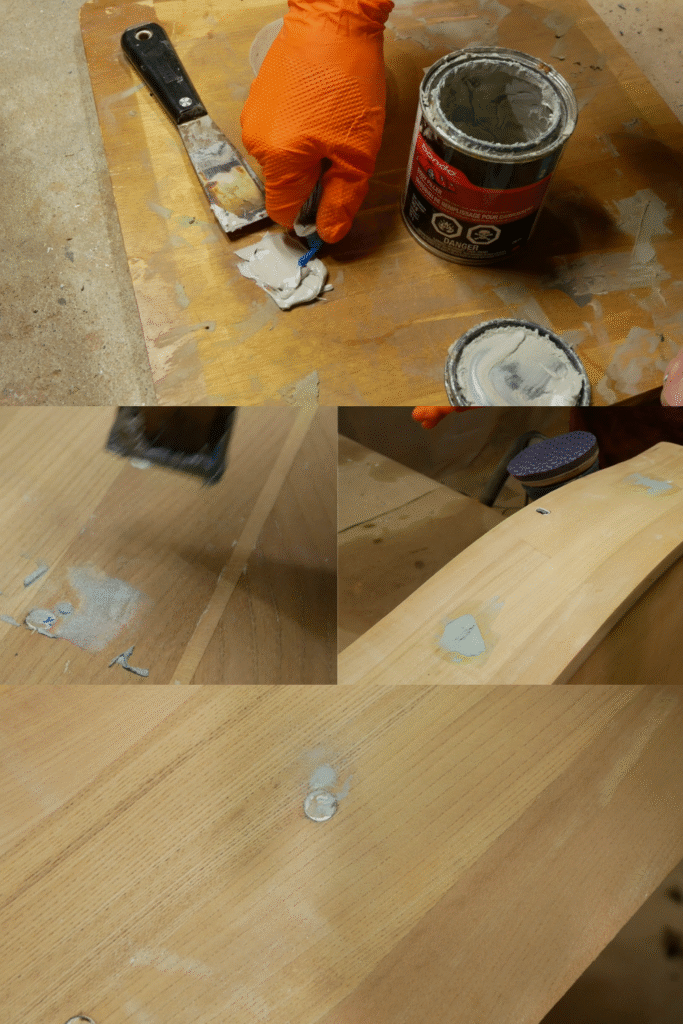
The drawers were a mess. The drawers had random pull holes throughout that just didn’t make much sense to me. On top of that, the drawers had lost their original veneer.
I filled all the extra holes with Bondo filler, which sets hard and sands smooth. Once it cured, I sanded everything flush so it would be invisible under the new veneer.
Part 6: Glue Repairs
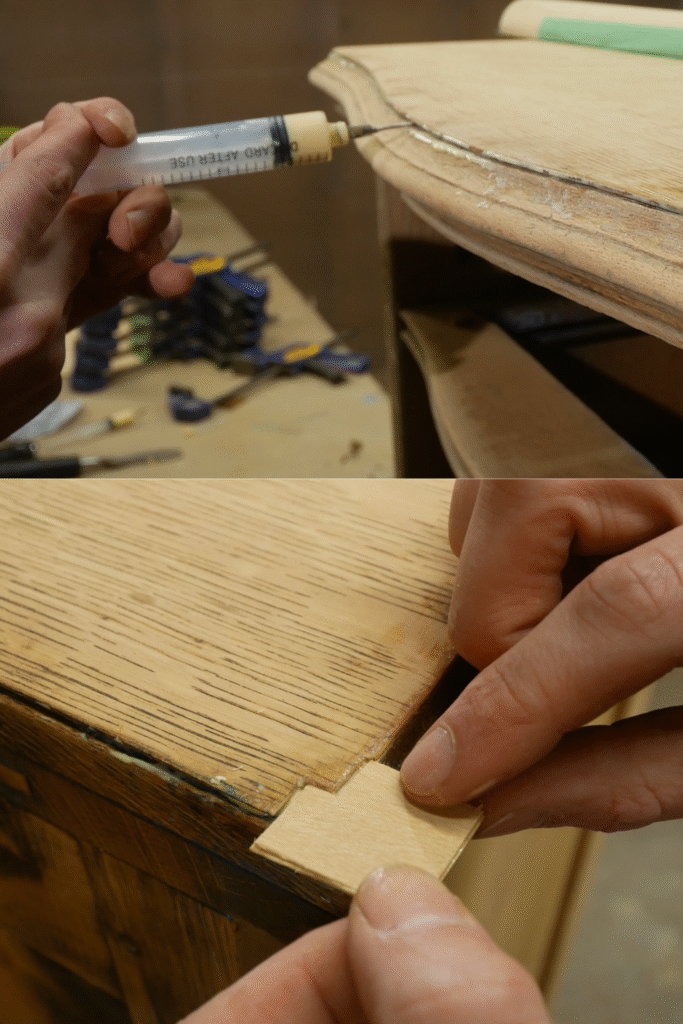
This piece had been through a lot, and the repairs were needed:
Top veneer: Someone had nailed it back down at some point (never do this). I tapped the nails in deeper, glued the veneer properly, and filled the nail holes later.
Veneer patch: One back corner of the top veneer was chipped away. I cut a fresh piece of veneer, glued it in, and clamped it tight with painter’s tape for a clean repair.
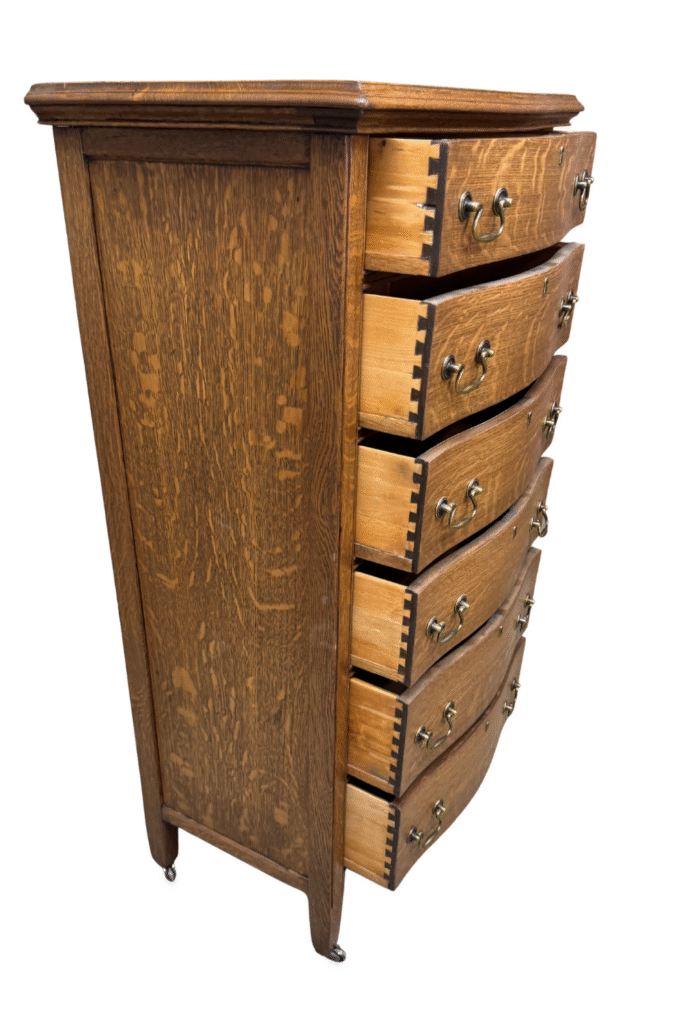
Part 7: Installing New Veneer on Drawers
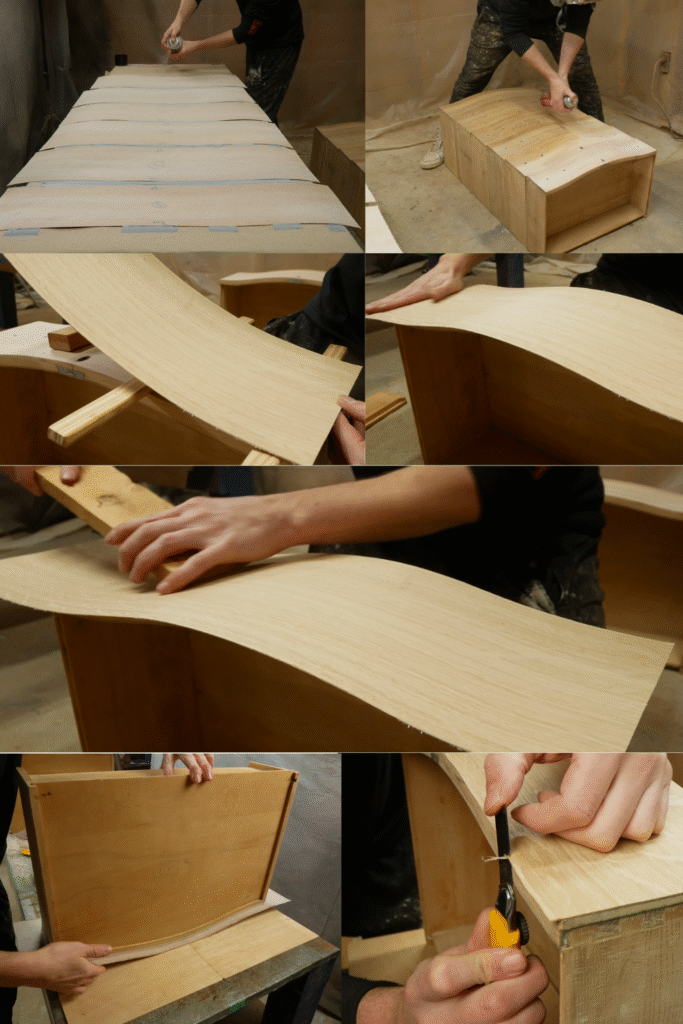
The biggest transformation was replacing the missing drawer veneer. I ordered beautiful quartersawn white oak veneer from veneersupplies.com, some of the best veneer I’ve worked with.
Here’s how I installed the veneer on the drawers:
-
Cut oversized sheets: 1–2 inches larger than the drawer face to allow wiggle room.
-
Spray adhesive: Taped the veneer face-down to protect it, then sprayed adhesive on both the drawer faces (on the drawers) and new veneer backs. I apply 2 coats of adhesive, I used Spray 77.
-
Wait until tacky: The surface should stick to your finger without being wet.
-
Apply veneer: I used wood strips as spacers so I could line it up before pressing. Started on one edge and pressed across to avoid bubbles.
-
For Bonding: I used a rounded-edge board to press everything down firmly without the venner getting scratched up/
-
Dry & trim: After letting it set, I trimmed the excess veneer flush to the drawers.
Once all drawers were veneered, it looked like a completely new piece!
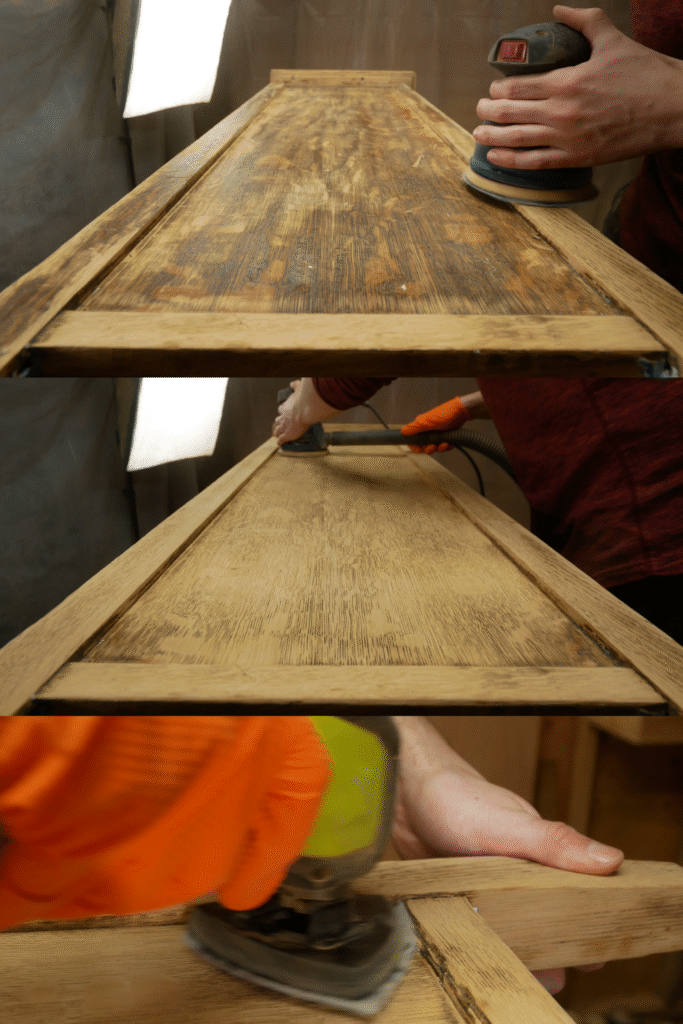
Part 8: More Sanding
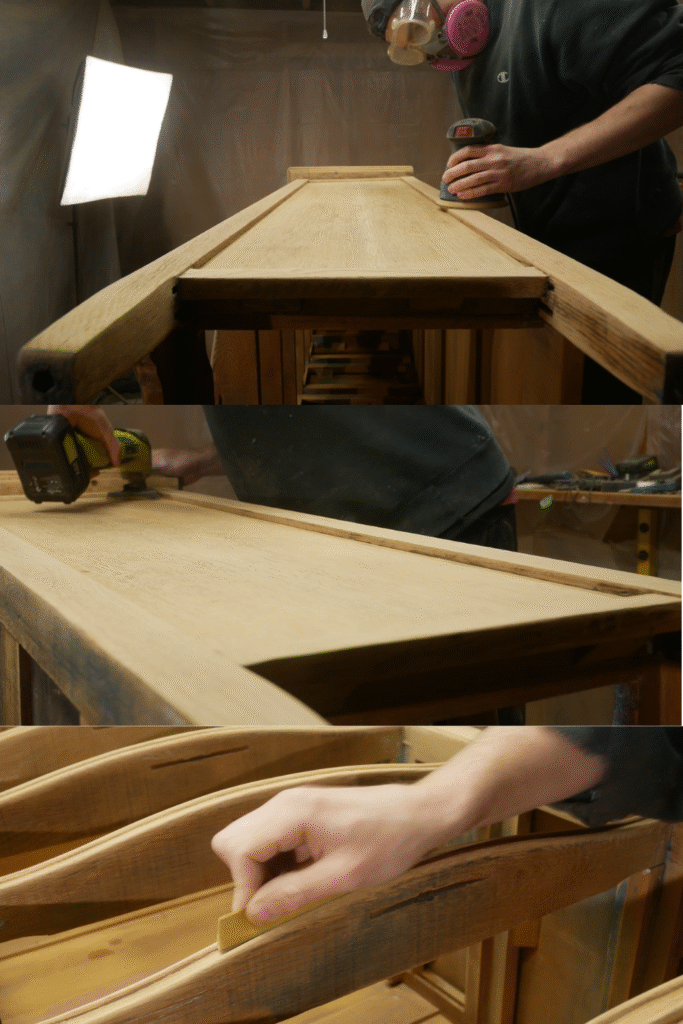
I gave the entire chest another sanding, this time up to 220 grit. For the new veneer, I sanded gently by hand to avoid sanding through the thin surface.
Part 9: Staining
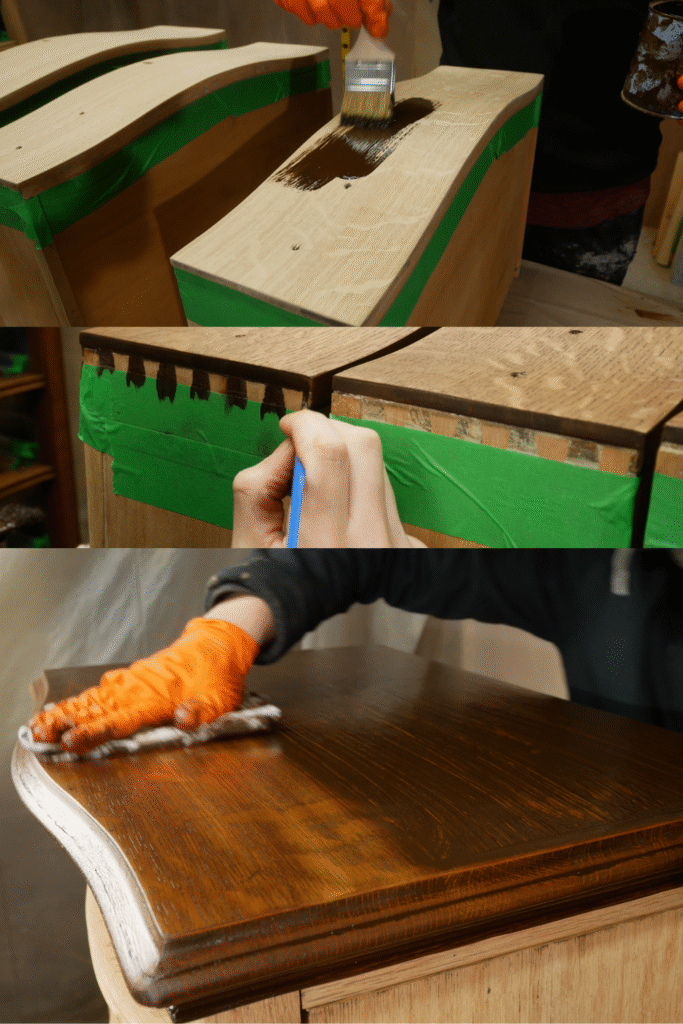
The color mix was a bit of experimentation. I blended Antique Walnut, Candlelite, Kona, and American Oak gel stains until I found the perfect shade, warm, rich, and true to antique quartersawn oak.
I applied the stain by wiping it on, and wiping it off, across the whole piece. The mix tied the veneer, solid oak, and patched areas together.
Part 10: Spray Lacquer
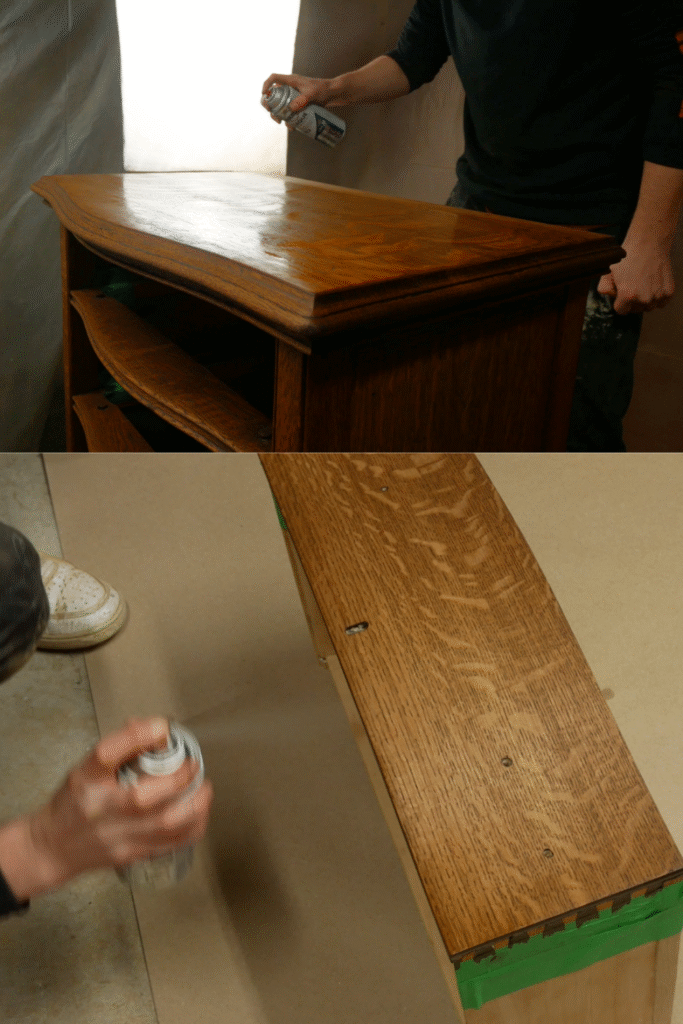
To finish, I sprayed five coats of lacquer. Each coat added depth and durability, giving the chest a rich sheen while letting the quartersawn oak grain patterns pop.
Part 11: New Hardware
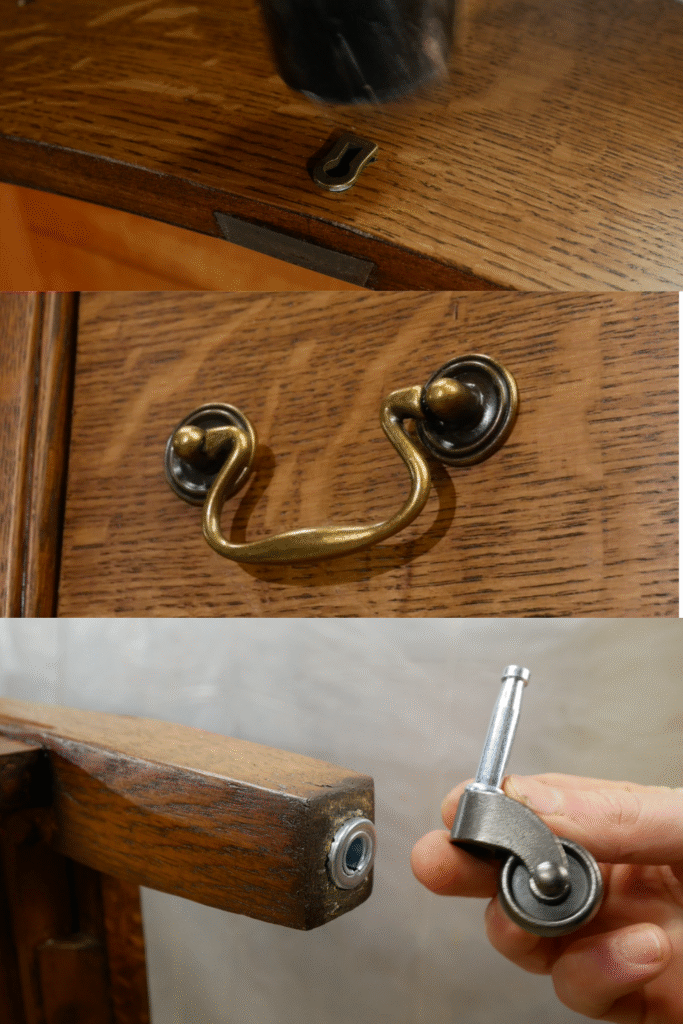
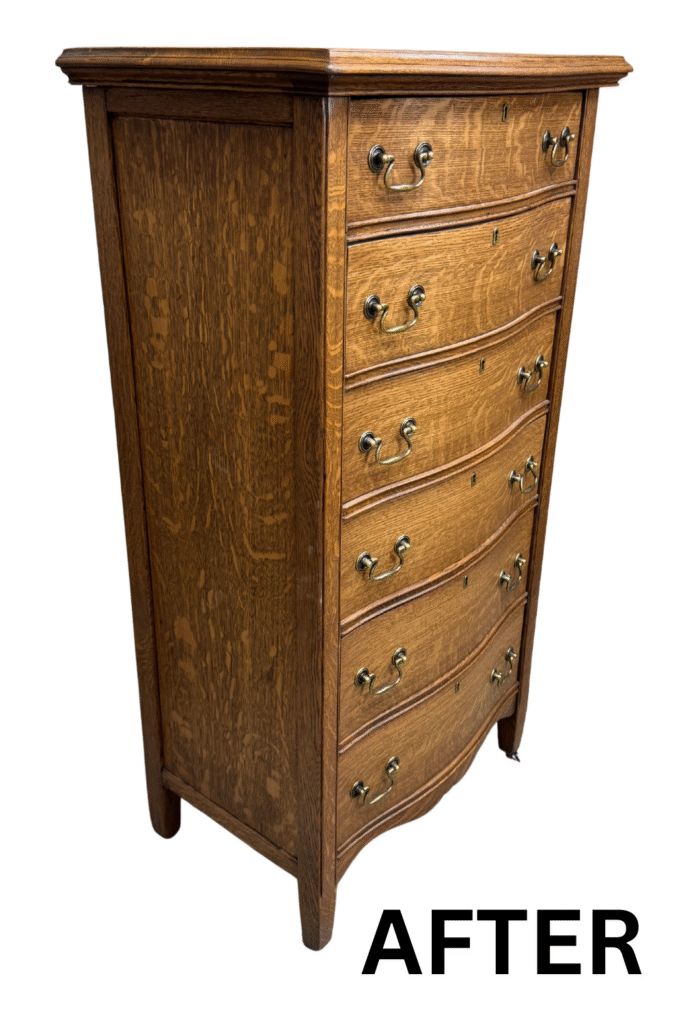
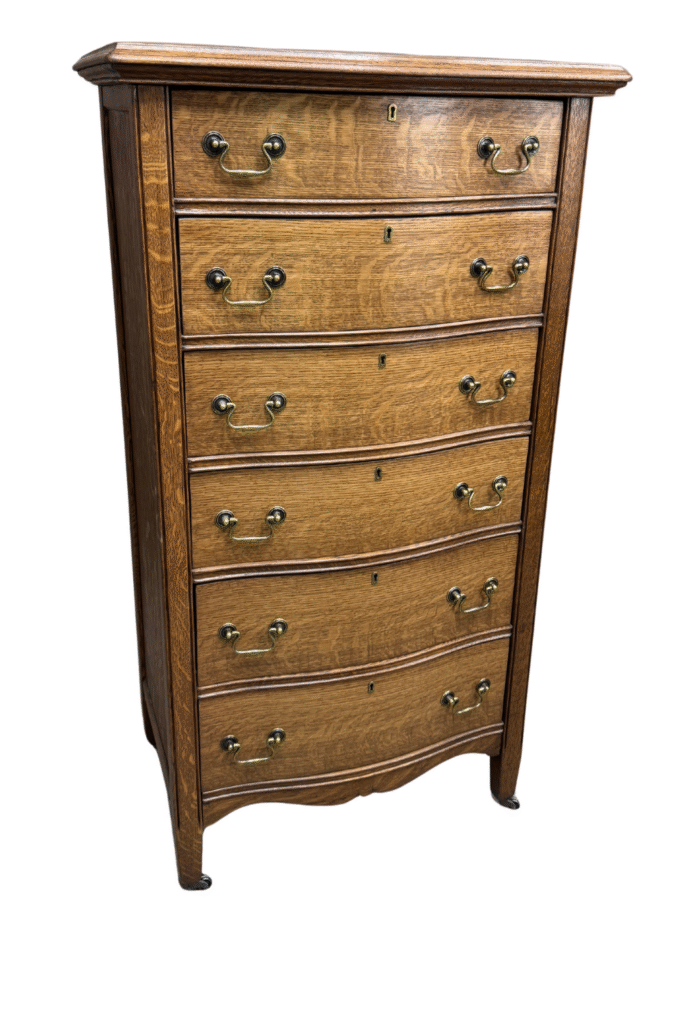
Finally, I added new antique-style pulls, casters, and escutcheons (keyhole covers). They completed the look and gave the chest that period-correct charm it deserved. After that it was looking better than ever!
The Final Reveal
🎥 Watch the Full Restoration on YouTube
See every step of the transformation here: Removing Years of Paint from an Antique Chest of Drawers
🛠️ Products Used in This Restoration
Amazing Premium Veneer Sheets – High-quality quartersawn white oak veneer
Bahco Carbide Scraper – My go-to for heavy paint removal
Hyde Contour Scraper – Perfect for rounded trim and curved edges
Varathane Kona Gel Stain – Rich dark tone for blending imperfections
General Finishes Oil-Based Gel Stain – Smooth, consistent color application
Scraper Tool Set – Detail scrapers for tight grooves and corners
Keyhole Inserts – Antique-style escutcheons for drawer faces
3M Super 77 Spray Adhesive – Strong hold for veneer application
Zinc Alloy Caster Wheels – Antique-style casters for a finished look
Mohawk Blendal Powder Stain – Great for color-matching veneer repairs
3M Sanding Mesh (150 Grit) – Long-lasting alternative to sandpaper
Sand Paper – Assorted grits for prep and finishing
Sanding Pad – Flexible sanding for contoured surfaces
Walnut Wood Filler – Perfect for filling small repairs and holes
BOSCH Random Orbital Sander – Reliable, smooth sanding power
3M Performance Paint Project Respirator – Safety protection when stripping and finishing
Olfa Utility Knife – Sharp and precise for trimming veneer edges
This chest of drawers went from being buried under paint to showcasing beautiful quartersawn oak once again. With new veneer, rich stain, protective lacquer, and hardware that suits its era, it’s ready for another hundred years of use.

