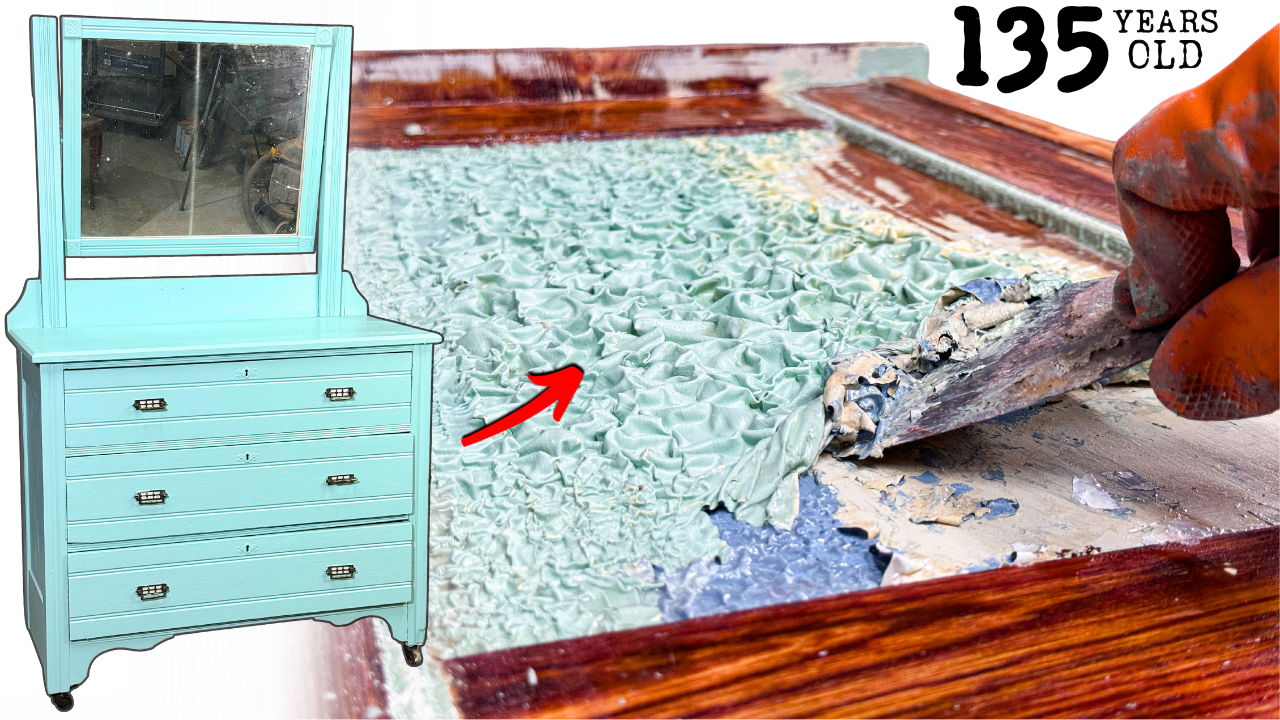
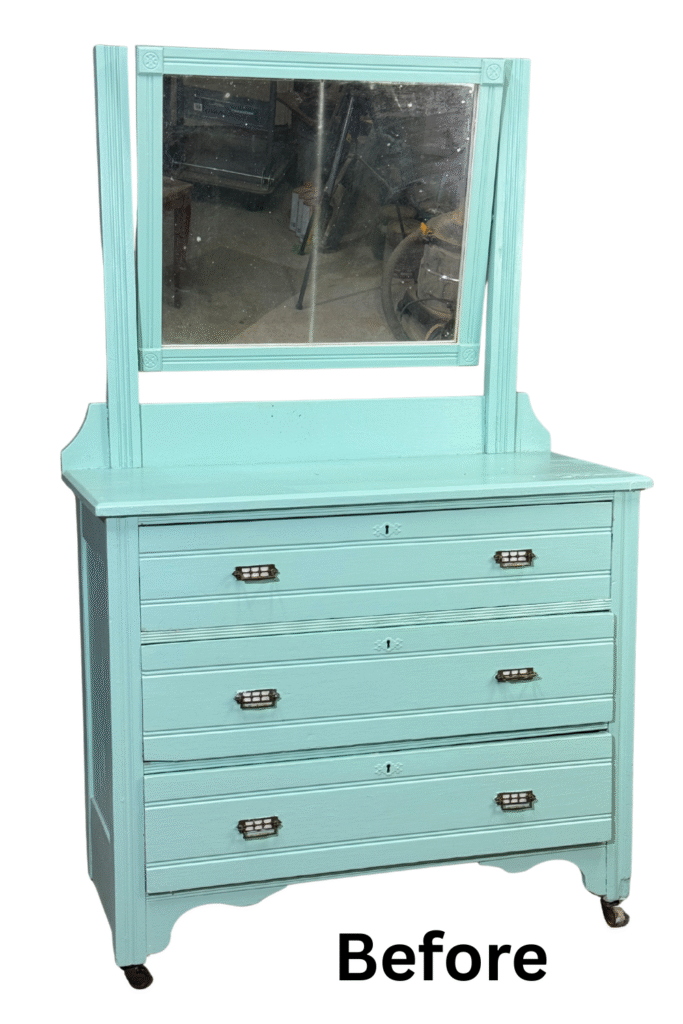
I found this dresser on Facebook Marketplace for just $20. At first, it looked like it was in decent shape, only it was buried under multiple layers of paint. I could tell it was an older piece, but when I removed the mirror, I discovered it was dated 1889. Even better? I found an actual late 1800s newspaper tucked behind the glass. That confirmed it for me, I had to bring this piece back to life!
Getting the Project Started
The first thing I did was start disassembling the dresser to make the stripping process easier. As I removed the mirror and its backing, I discovered a stamp that read:
“Munderloh & Co. – Montreal – Aug 15, 1889.”
It’s common for antique furniture to have dates stamped on mirrors!
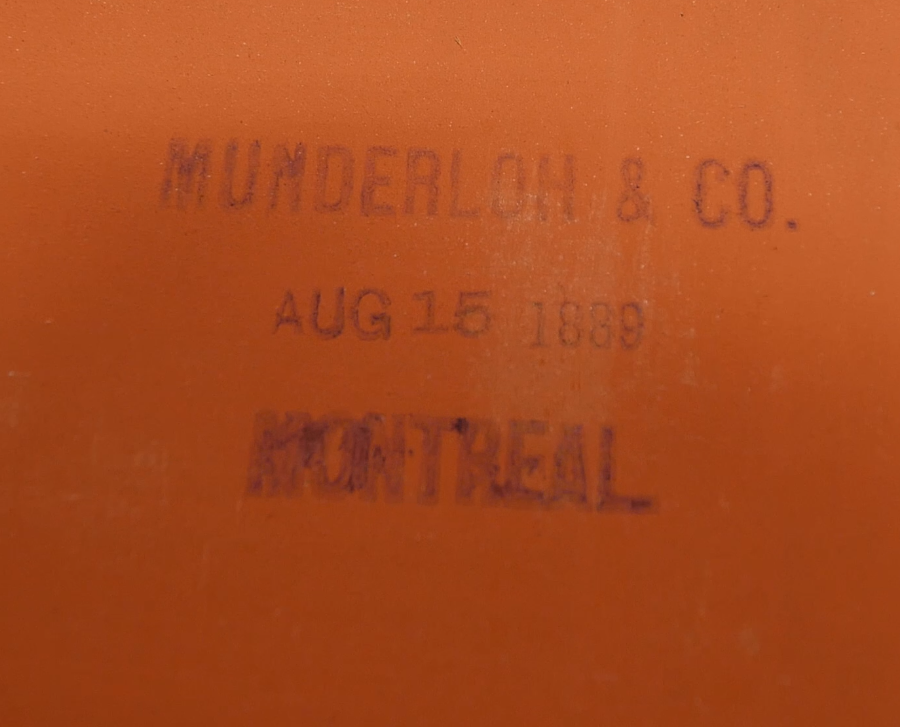
After a bit of research, I found out that Munderloh & Co. was a furniture company founded in 1861 by Wilhelm C. Munderloh, a German immigrant. The company specialized in imported furniture and materials from Germany, Belgium, and France, while being based in Montreal, Canada. It’s very possible that this dresser was built using some of those imported woods or hardware.
To top it off, tucked behind the mirror glass was a fragile 1800s newspaper, a small time capsule that made this restoration feel even more special. Honestly, I thought it was cool as heck.
Before I went any further, I decided to run a lead test on the paint, just to be safe. Thankfully, the results came back clear and I could continue on and remove some paint.
Step 1: Paint Stripping
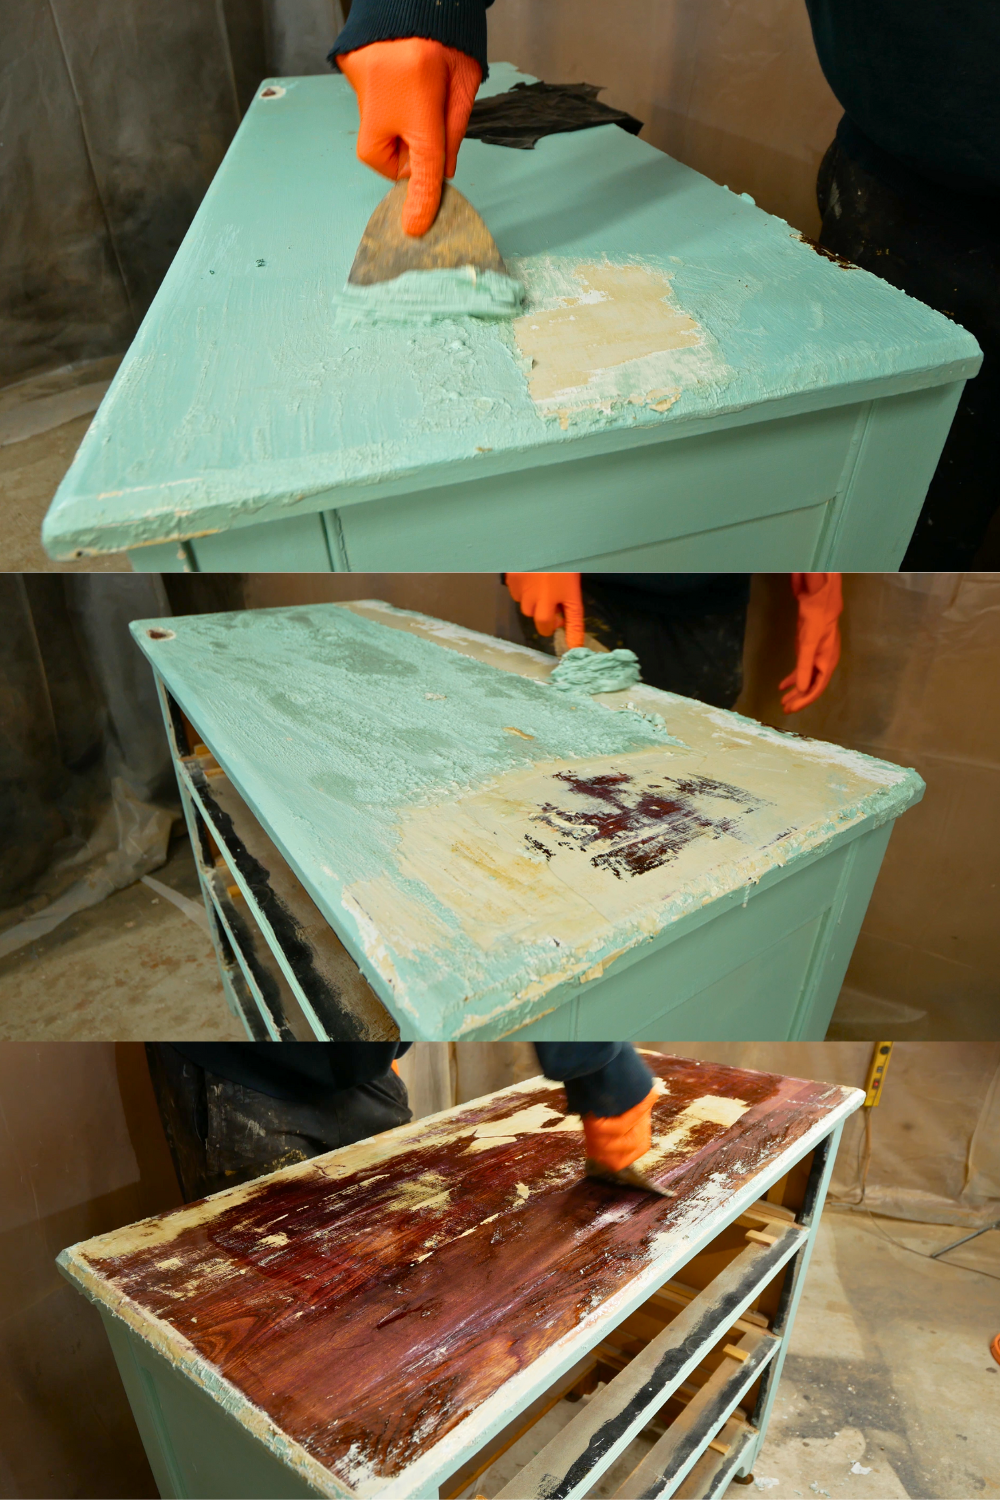
I started by testing a small area with paint stripper. The top layer of blue paint came off pretty easily, but underneath that was a tough, unusual primer that didn’t want to budge. It almost had a plaster-like texture, and it took multiple coats of stripper to start breaking it down. This wasn’t your average old paint job…
As I continued, I noticed something strange happening with the wood underneath. The more I stripped, the more I revealed this deep purple color in the grain. My guess? It’s potassium permanganate, which is a chemical that was historically used to give wood a rich brown tone, but can sometimes react with water or stripper and turn purple, especially on solid elm wood.
To try and reduce the purple effect, I switched tactics and began scraping the paint manually using a carbide scraper. This helped a bit, but it was a slow and tough process.
In the carved and detailed areas, I alternated between scraping, applying more stripper, and using detail picks and dental-style tools to clean out all the tight spots and open grain. This step alone took several days of work.
Step 2: Oxalic Acid Attempt
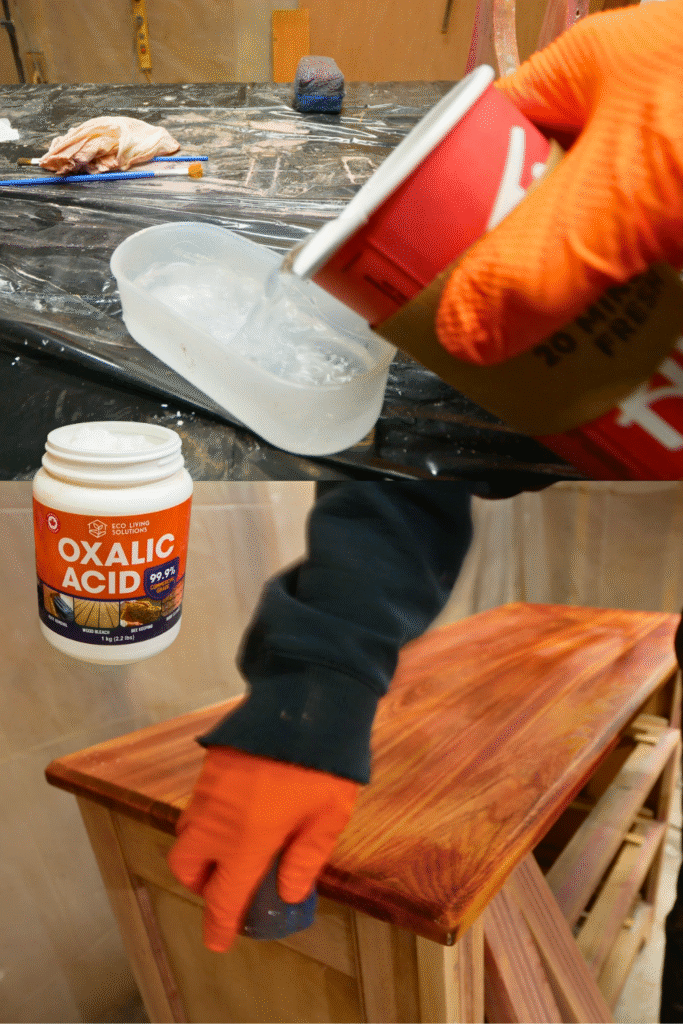
After scraping off as much of the purple-stained paint and primer as I could, I decided to try a little chemistry experiment. I mixed up a batch of oxalic acid to see if it would help lighten the purple staining in the wood.
Why oxalic acid? Well, according to chemistry, oxalic acid reacts with potassium permanganate, and when the two mix, they can create a clear solution. Since I suspected that the purple hue was caused by residual potassium permanganate, I figured it was worth a shot.
I applied the oxalic acid to several areas and let it sit. While the change wasn’t dramatic, it did help slightly tone down some of the purple, especially in lighter areas of the wood.
It wasn’t a perfect fix, but it was a helpful step in neutralizing some of the unusual discoloration before sanding.
Step 3: Glue Repairs

With the stripping and chemical work done, it was time to tackle a few minor structural repairs.
One of the drawer faces had a chipped corner, so I carefully chiseled the area flat and glued on a new piece of solid wood. Once the glue dried, I used a flush cut saw to trim it clean and level with the rest of the drawer.
Another damaged spot was on the front lower leg, where there was a noticeable chip. I used the same method, chiseling out a box-shaped section, gluing in a new wood patch, clamping it in place, and cutting it flush once fully dried.
These kinds of repairs take a little patience, but they blend in nicely once stained and finished, and help keep the piece structurally sound for many more years of use.
Step 4: Sanding
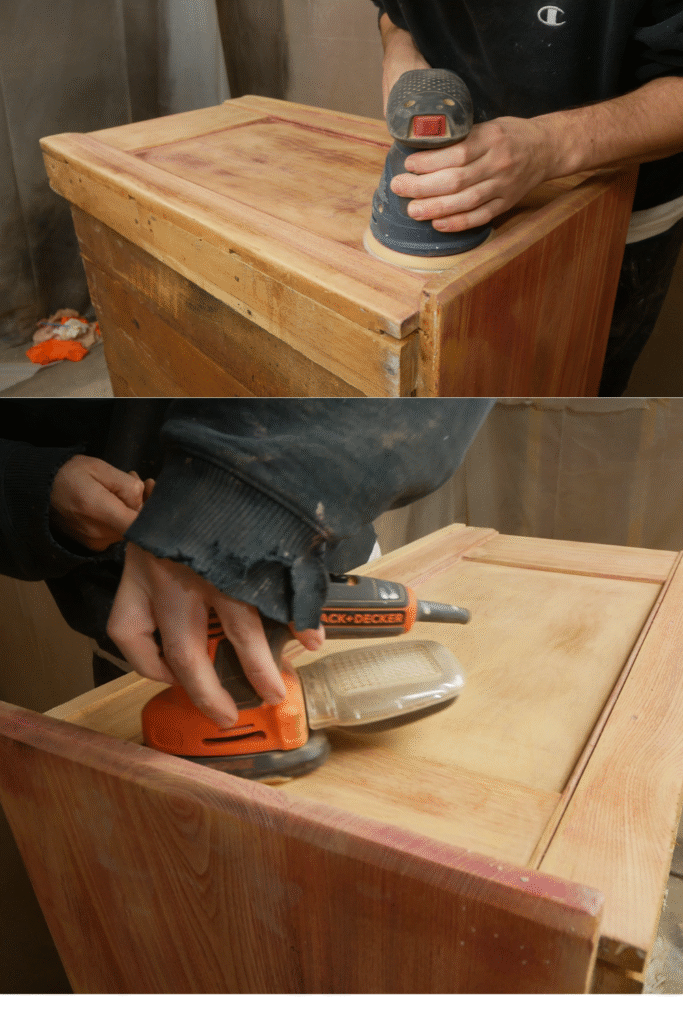
Once the repairs were done, I moved on to sanding the entire piece to prep it for finish.
I used my Bosch random orbital sander with 150 grit sandpaper, then worked up to 220 grit for a smoother surface. For the corners my round orbital sander could not reach, I switched to a detail mouse sander using the same grits.
In the tight grooves and carved sections, I went in by hand to make sure everything was clean, smooth, and ready for finishing. It took some time, but it really helped bring out the beauty of the grain, especially after all that paint and stripping.
Step 5: Gel Stain
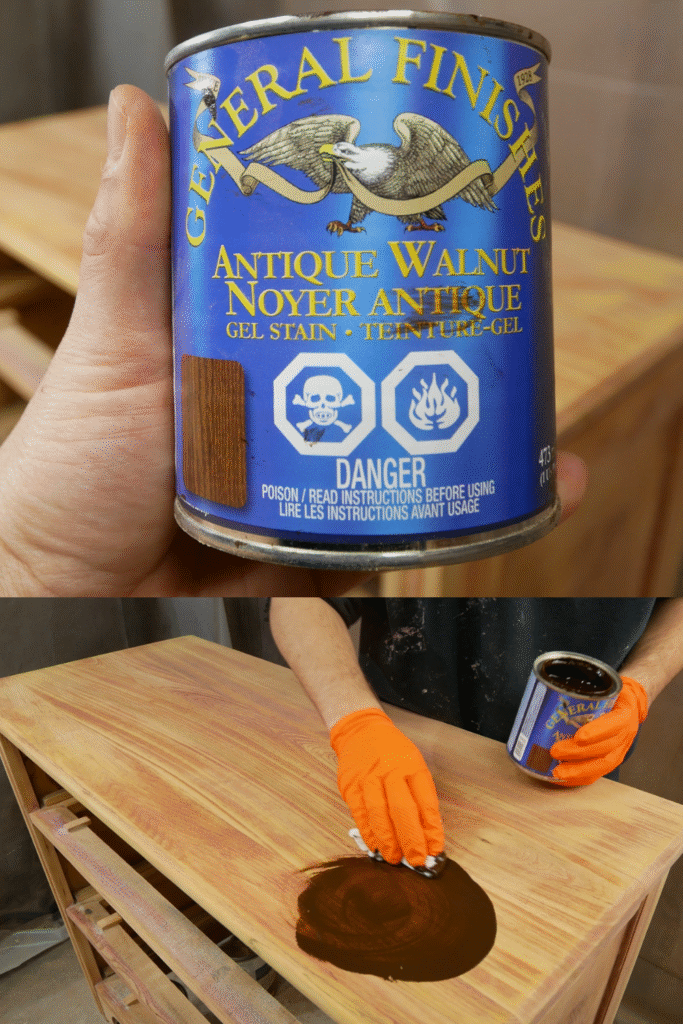
For the color, I used Antique Walnut Gel Stain by General Finishes. I applied it using a cloth, wiped it on generously, then wiped it off to let the grain show through.
Gel stain is great for antique restorations like this because it offers rich color and is easy to control, especially on vertical surfaces and detailed areas. I like gel stains on old painted stripped pieces to help hide any damages the paint may have caused.
Step 6: Refinished the Antique Casters
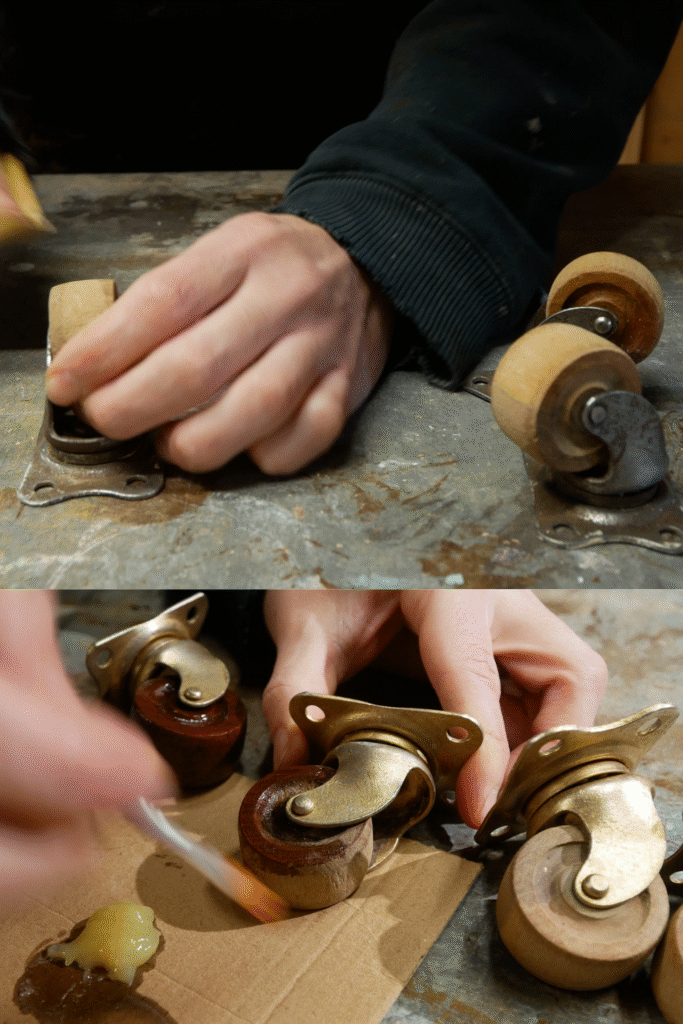
The original wood-wheel metal casters were still intact, but they definitely needed some love.
I started by cleaning off the old paint from both the metal and wood parts. Once cleaned, I rubbed Howard’s Feed-N-Wax into the wooden wheels to condition and bring back their natural color.
For the metal housing, I applied a bit of gold gilding wax to give it a soft, aged shine without making it look too new. It helped restore the original character of the piece while giving the base that perfect finishing touch.
Step 7: Spray Lacquer Finish
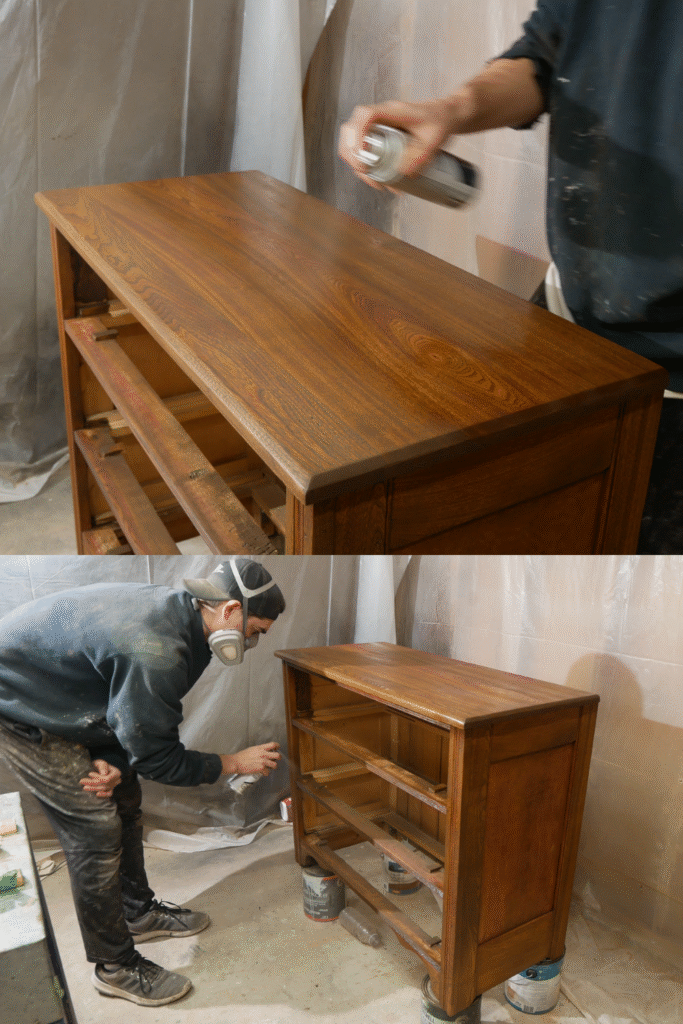
After letting the stain dry and giving the entire piece a quick wipe-down with a tack cloth to remove any lingering dust, I moved on to applying the final finish.
I used a spray aerosol lacquer in satin and applied 4 thick coats to the flat horizontal sections and 6 light coats to vertical areas top prevent drips.
🛠️ Products Used in This Restoration
These are the tools and products I used throughout the project (includes affiliate links):
-
Watco Lacquer Spray – Durable aerosol lacquer for the final finish
-
Lead Test Kit – To safely check for lead-based paint
-
Bahco Carbide Scraper – For tough scraping jobs and paint removal
-
BOSCH Random Orbital Sander – My go-to electric sander
-
Titebond II Wood Glue – Strong, reliable wood glue for repairs
-
Olfa Utility Knife – For detail trimming and quick cleanups
-
General Finishes Antique Walnut Gel Stain – Rich color with great control
-
Scraper Tool Set – For getting into tight grooves and crevices
-
3M Sanding Mesh – Great for reusable sanding
-
Assorted Sandpaper – Used throughout sanding stages
-
3M Performance Paint Project Respirator – Always wear protection when stripping or spraying
-
Foam Sanding Pad – For contoured edges and fine smoothing
-
Circa 1850 Stripper – Available at Home Hardware (Canada)
-
Flush Cut Saw – For trimming patch repairs cleanly
-
Bar Keepers Friend – For cleaning metal hardware
-
Gold Gilding Wax – Used to refresh the metal casters
-
Howard’s Feed-N-Wax – Conditions and restores wood tones on wheels and more
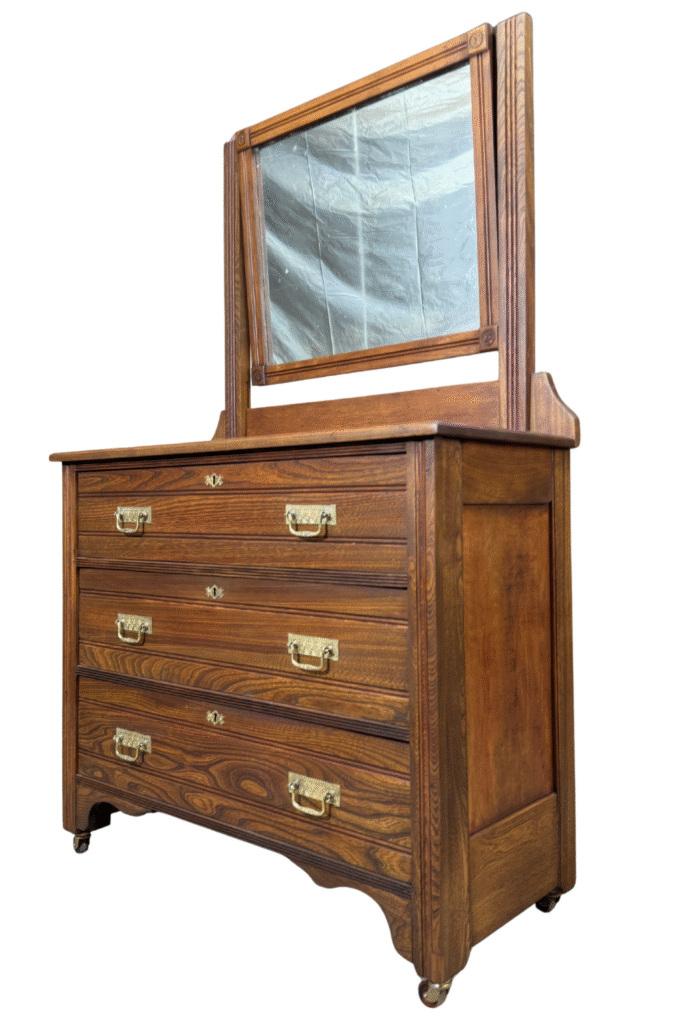
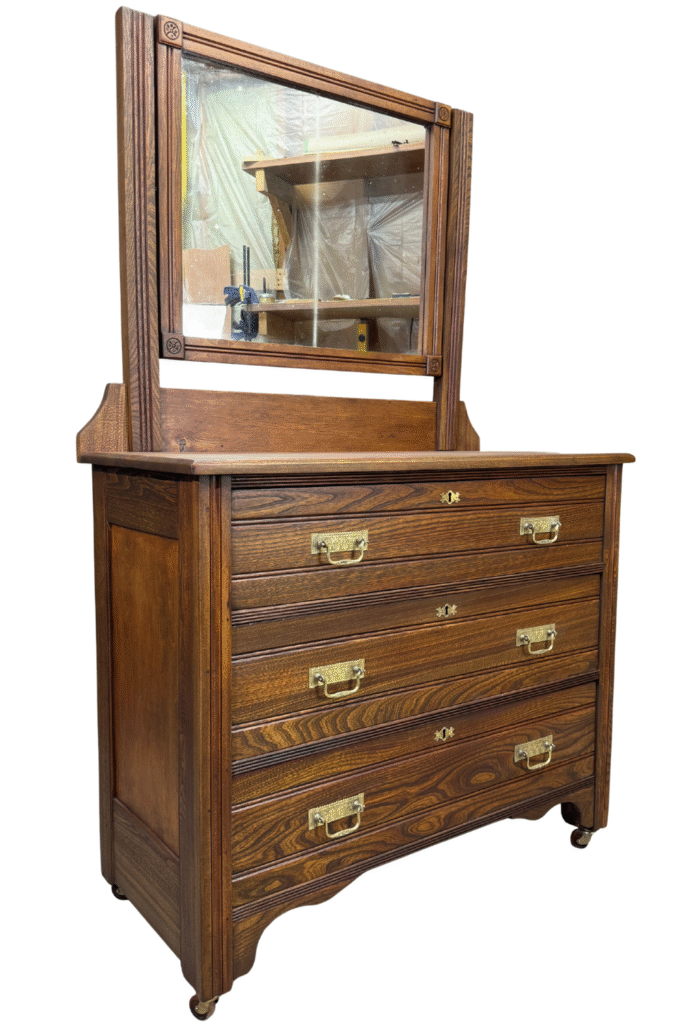
The Final Reveal!
After all the days of stripping, sanding, staining, and finishing… it was finally done. And the results? Totally worth it.
Seeing the solid wood grain shine through again, especially on a piece as old as this 1889 Eastlake dresser, was incredible. The rich tones, the cleaned-up details, the restored casters… everything came together to bring this antique back to life!
This was one of those projects that reminded me why I love furniture restoration. A little patience, a lot of work, and a second chance for a piece of history.
🎥 Watch the Full Restoration on YouTube
Don’t forget to subscribe to the YouTube channel so you don’t miss my future videos 🙂

