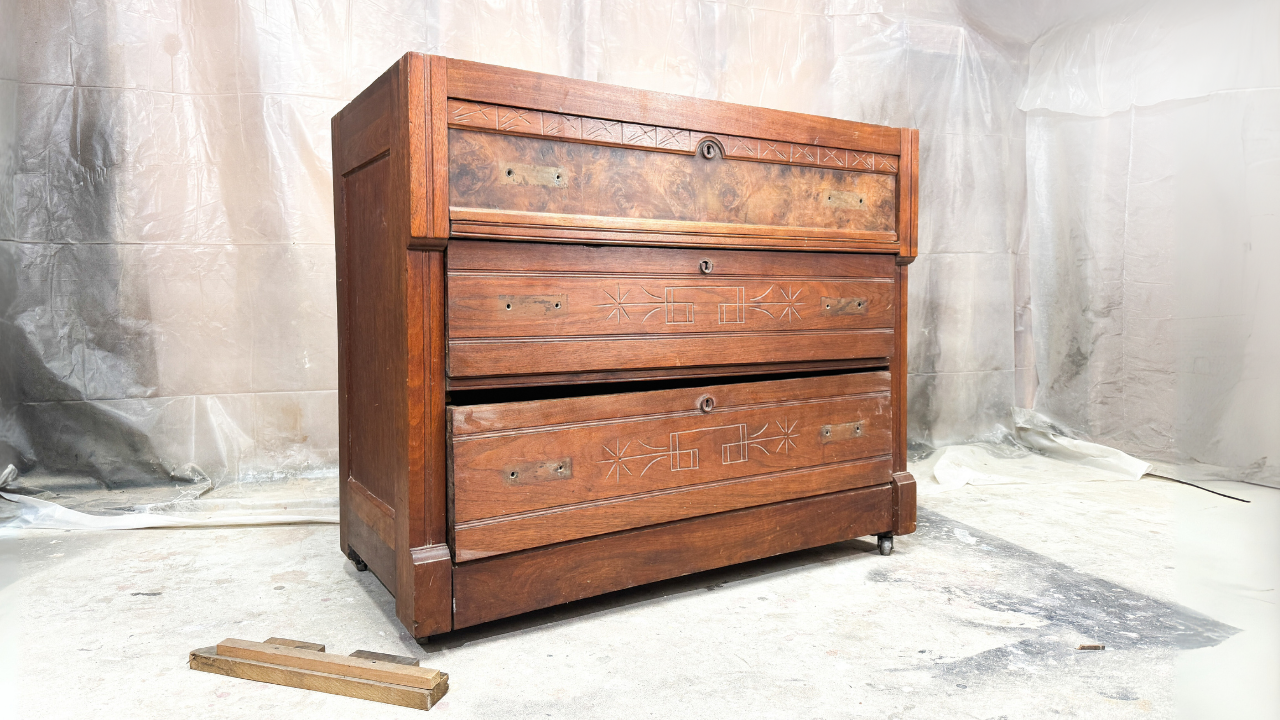
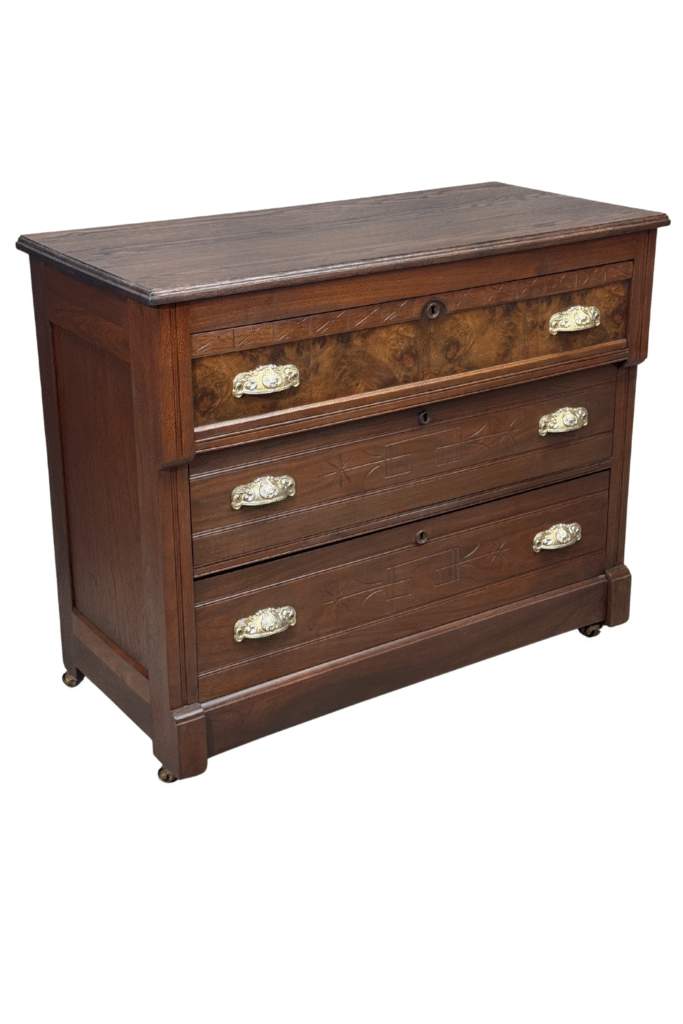
I picked up this antique Eastlake dresser from Facebook Marketplace for $100. Honestly, it was a little more than I wanted to pay, but I really wanted the hardware, it was perfect for another Eastlake dresser restoration I had on the go.
Luckily, this piece wasn’t painted. That alone saved me a lot of work compared to some of my past projects. It was still rough, but I knew with some time and effort, it could shine again. Here’s the full step-by-step restoration process.
Step 1: Cleaning & Prep
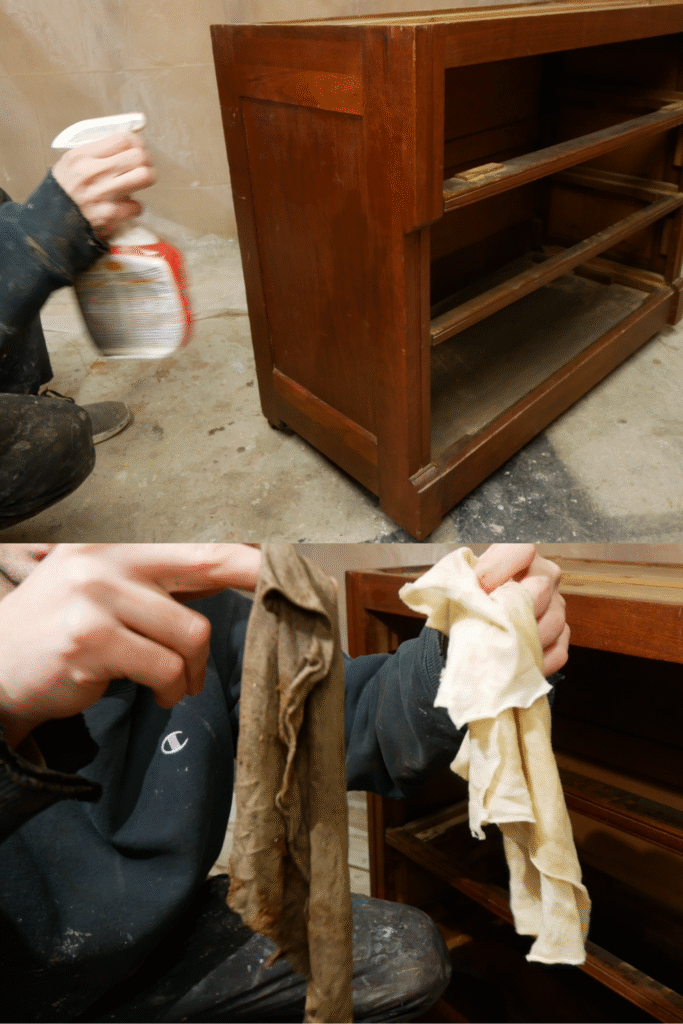
First things first, I gave the dresser a deep clean. I sprayed it down with Krud Kutter mixed with water and wiped every surface thoroughly. This step removes years of grime, oils, and residues that can interfere with sanding, staining, or finishing later on.
Step 2: Removing the Old Finish
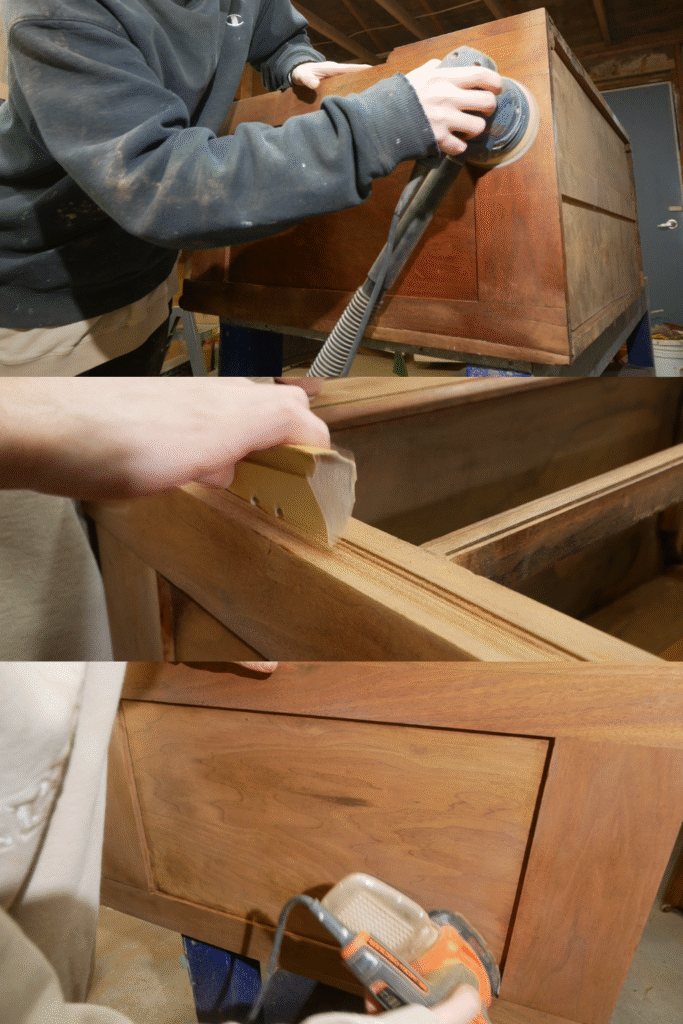
With the surface clean, I tackled the old finish. Using both hand sanding and my BOSCH random orbital sander, I worked through the surfaces until I reached bare wood.
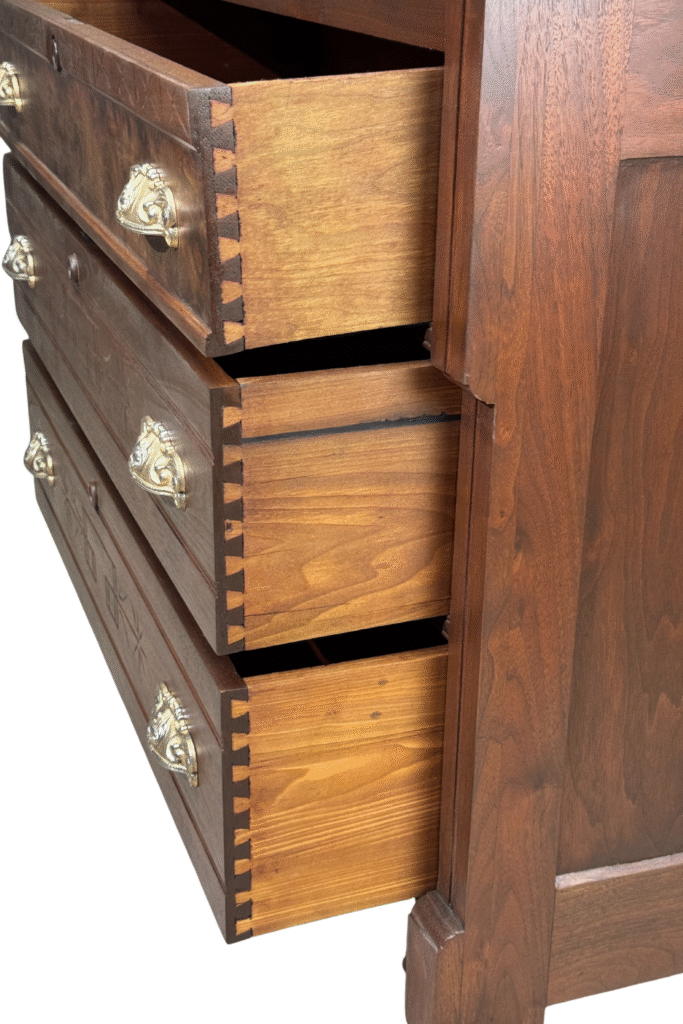
I didn’t stop at the outside—I also sanded the inside of all the drawers. A lot of people skip this step, but refinishing drawer interiors makes the entire piece feel fresh and clean.
Step 3: Glue Repairs & Wood Fixes
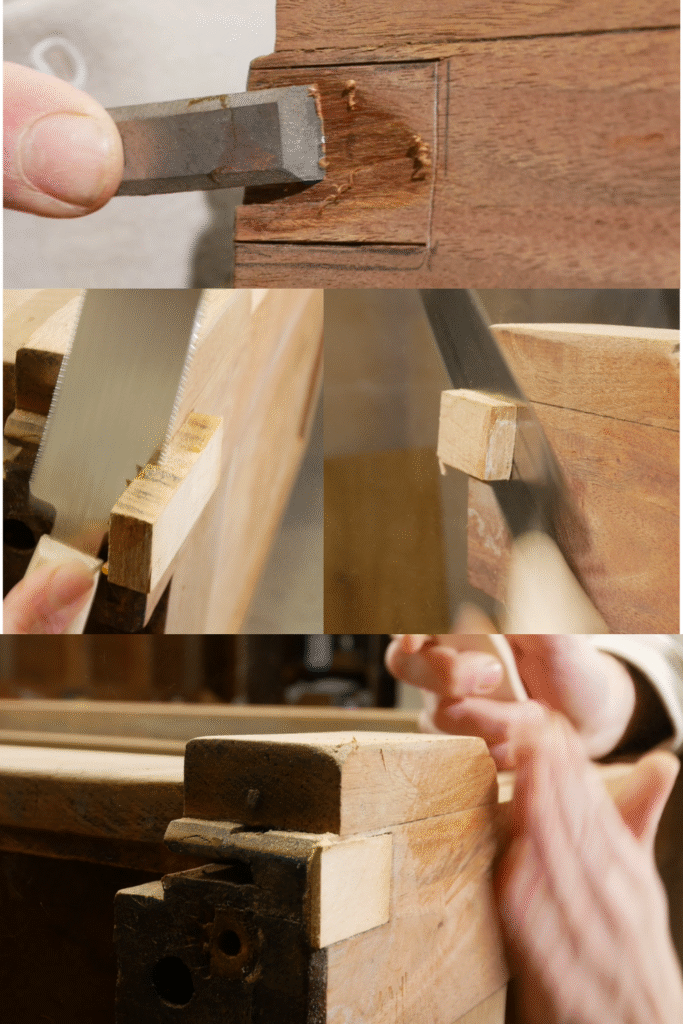
Like many antiques, this dresser had its share of loose joints and damage:
-
Back edge repair: A previous owner had nailed a chipped section from the back edge in place. Instead, I pulled the nails and glued it properly with Titebond II wood glue.
-
Cracked drawer panel: I glued it back together and clamped it until solid.
-
Cracked drawer side: Another glue-and-clamp job.
-
Major chip in the front side bottom: This was the biggest repair. I chiseled the damaged area square, glued in a new piece of wood, and trimmed it flush with a flush cut saw.
-
Filler repairs: For smaller imperfections, I used wood filler.
-
Keyhole resizing: One drawer’s wooden keyhole insert was broken, I purchased a pre-made new one, which was too large. So I carefully trimmed it smaller with an Olfa utility knife until it looked right. I sanded it perfectly.
These repairs gave the dresser structural integrity again while preserving as much original wood as possible.
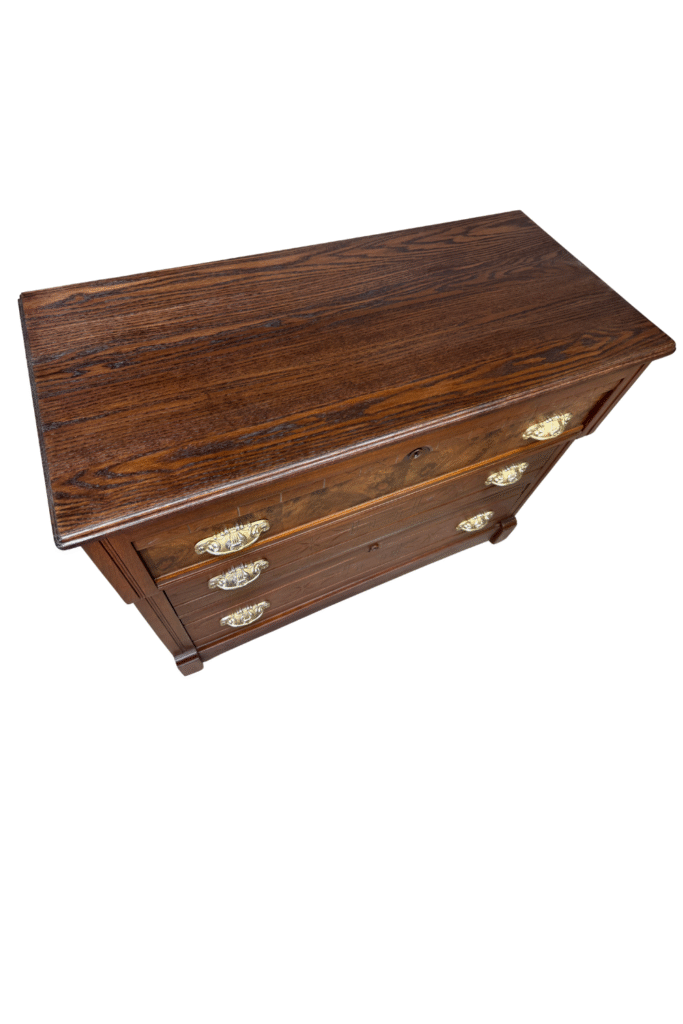
Step 4: Building a DIY New Dresser Top
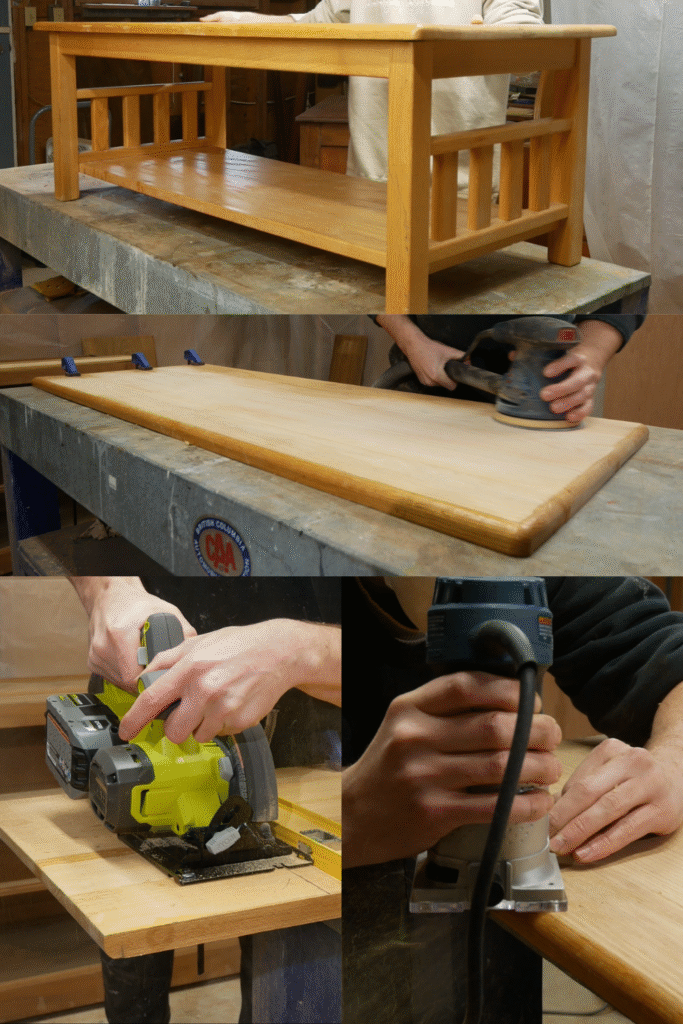
The original top was missing, likely old marble, so I came up with a creative solution: repurposing an old oak coffee table I found at the SPCA thrift store.
- I took it apart first.
-
I sanded the coffee table top back to bare wood.
-
Cut it down to the correct size for the dresser, leaving a small overhang on all sides.
-
Routed the edges with a Roman Ogee router bit, giving it the same Eastlake-style detail as the base dresser.
At this stage, it didn’t match the walnut body, but I had a staining plan for that.
Step 5: Sanding Everything Smooth
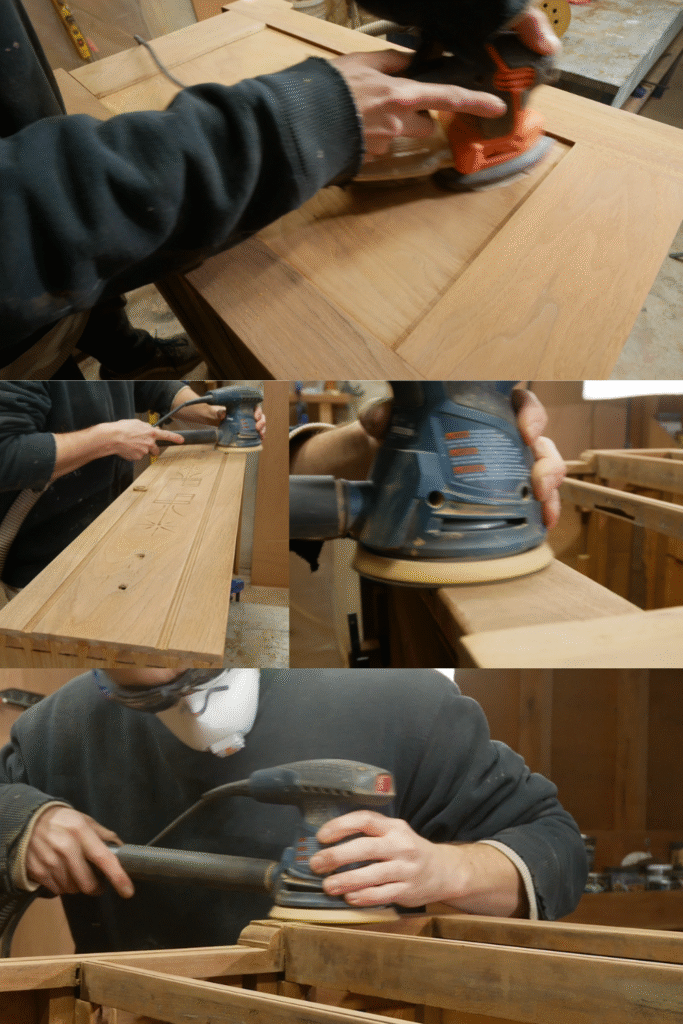
Once all the glue repairs were dry, I sanded them flat and blended them into the surrounding surfaces. Then I sanded the entire dresser up to 220 grit for a smooth, even finish. The prep work was now done, and the piece was ready for stain.
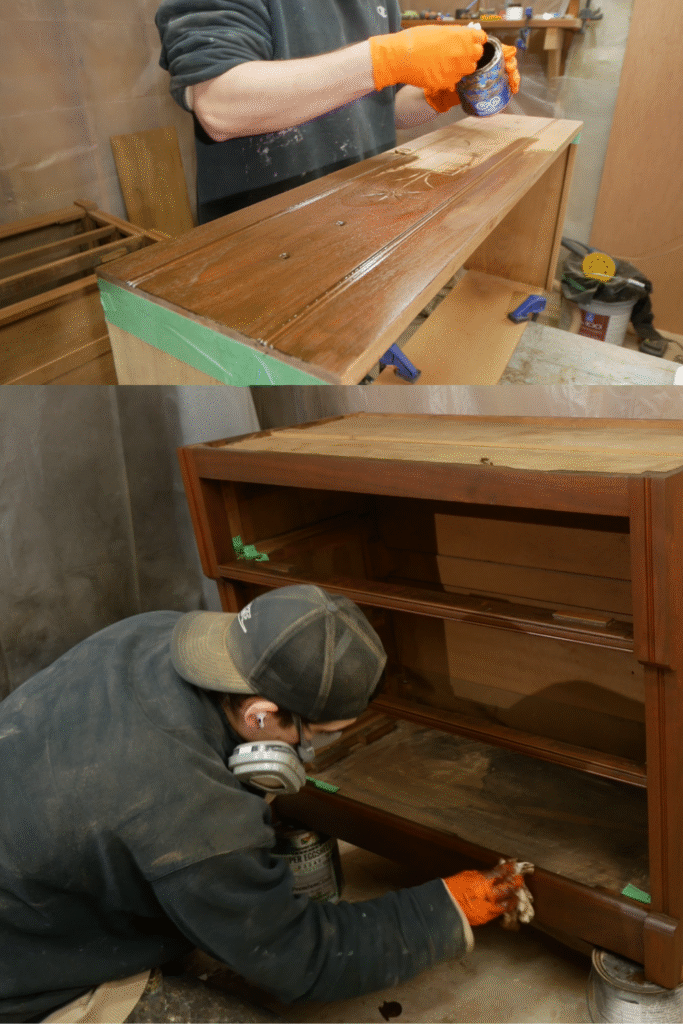
Step 6: Staining the Dresser Body + Drawers

For the main body and drawer faces, I used General Finishes Antique Walnut Gel Stain. The rich tone really enhanced the walnut grain and brought out its depth.
As a finishing touch, I even stained the exposed dovetail joints on the drawers. It’s a small detail, but it makes the craftsmanship pop.
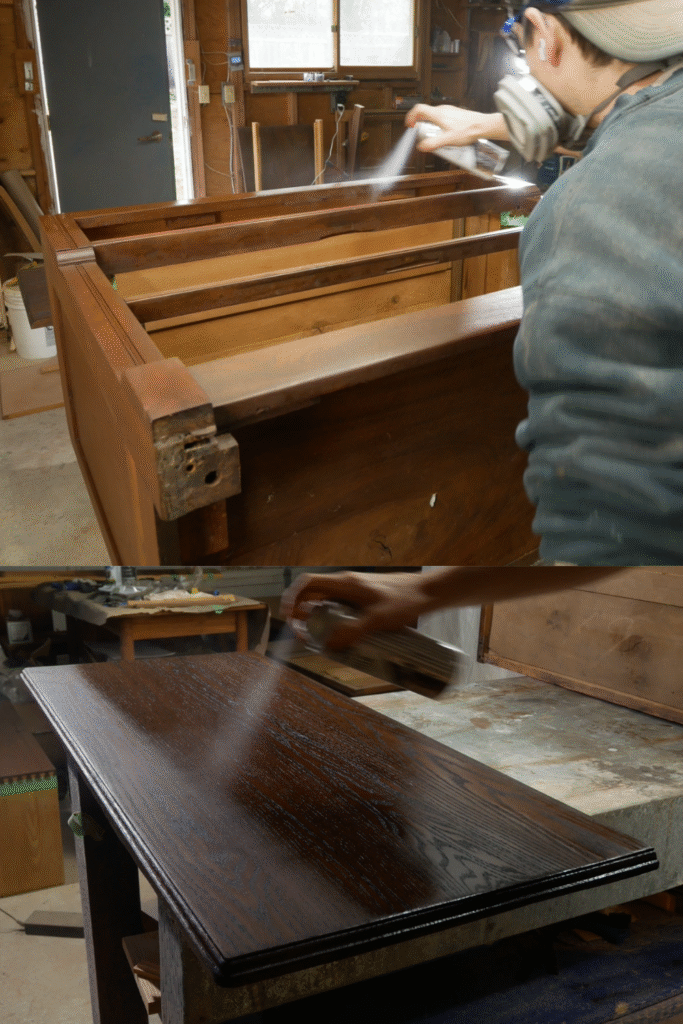
Step 7: Staining the DIY Top
Matching the oak coffee table top to the walnut body was a challenge. Using the same gel stain would’ve looked way off. Instead, I turned to General Finishes water-based stains in Provincial, Brown Mahogany, and Antique Brown.
After testing, here’s the formula that worked:
-
First coat: Brown Mahogany as a base.
-
Second coat: A custom mix of Brown Mahogany and Antique Brown.
This layering technique gave me the depth and warmth I needed, and the new top blended beautifully with the dresser body.
Step 8: Touch-Ups with Shellac & Blendal Powders
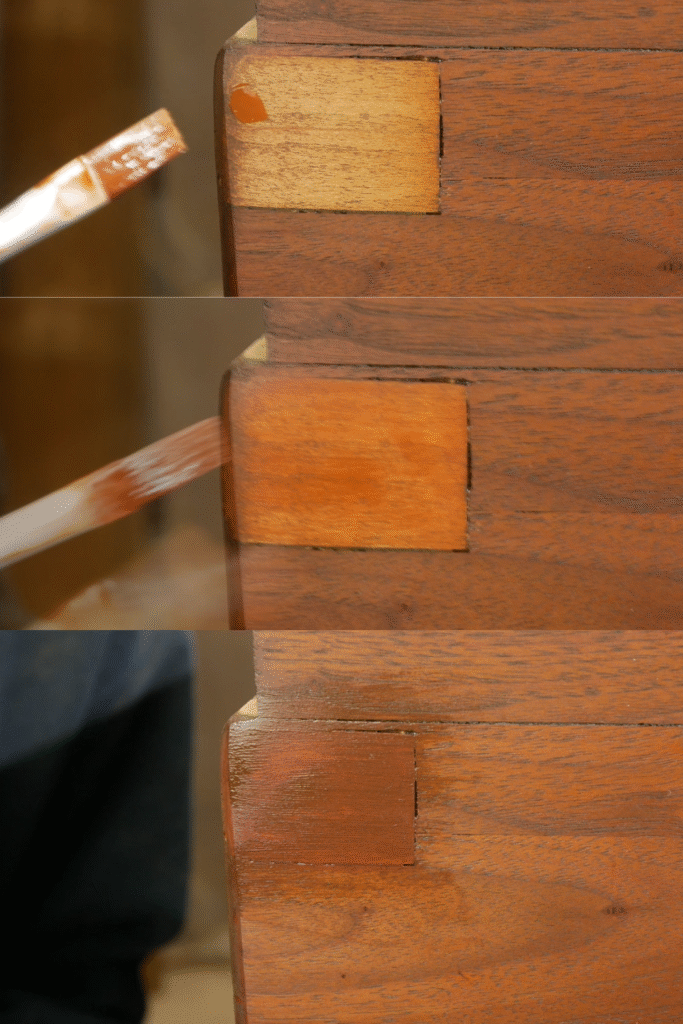
Even with good staining, repaired areas can sometimes stand out. To fix this, I used shellac combined with Mohawk Blendal powder stains to color-match filler and glue-up areas. This is a trick I often use to disguise repairs and make them practically invisible.
Step 9: Protective Lacquer Finish
Finally, I sealed the dresser with five coats of Watco spray lacquer. I kept my workshop fan running and wore a 3M Performance Paint Project Respirator with OV cartridges for safety.
Each coat of lacquer added protection and sheen, giving the piece that smooth, glowing antique finish.
The Final Reveal
After all that work, this Eastlake dresser was transformed. With its new solid top, repaired structure, rich walnut tones, and period-correct style, it’s ready to last another lifetime.
🎥 Watch the Full Restoration on YouTube
🛠️ Products Used in This Restoration
- Watco Lacquer Spray
- BOSCH Random Orbital Sander
- Titebond II Wood Glue
- Olfa Utility Knife
- GF Antique Walnut Gel Stain
- GF Water Based Stains
- Pick Tool Set
- 3M Sanding Mesh
- Sand Paper
- 3M Performance Paint Project Respirator
- Flush Saw
- Bar Keepers Friend
- Gilding Wax
- Howards Feed-n-Wax
- New Pulls – Lee Valley Tools
- Color Matching Mohawk Blendal Powder Stains
- Shellac Spray
- Bosch Router Bits

