
I’ve worked on many pieces of old furniture that had layers of paint built up over the years. Paint can hide beautiful wood, and today showing off natural wood grain is more popular than ever. Whether you’re restoring an antique, flipping a marketplace find, or just bringing an old piece back to life, removing paint is often the first big step. The good news? There are several reliable ways to do it.
What’s the Best Method?
There isn’t one single “best” method, it really comes down to your specific project and personal preference. In fact, I almost always use a combination of methods. Typically, your starting method will take off the bulk of the paint, then you can switch to another technique for cleanup and detailing.
In this guide, I’ll walk you through 5 methods i have personally done for removing paint from wood furniture, why you might choose one over another, and what you should know before getting started.
1. Paint Stripper
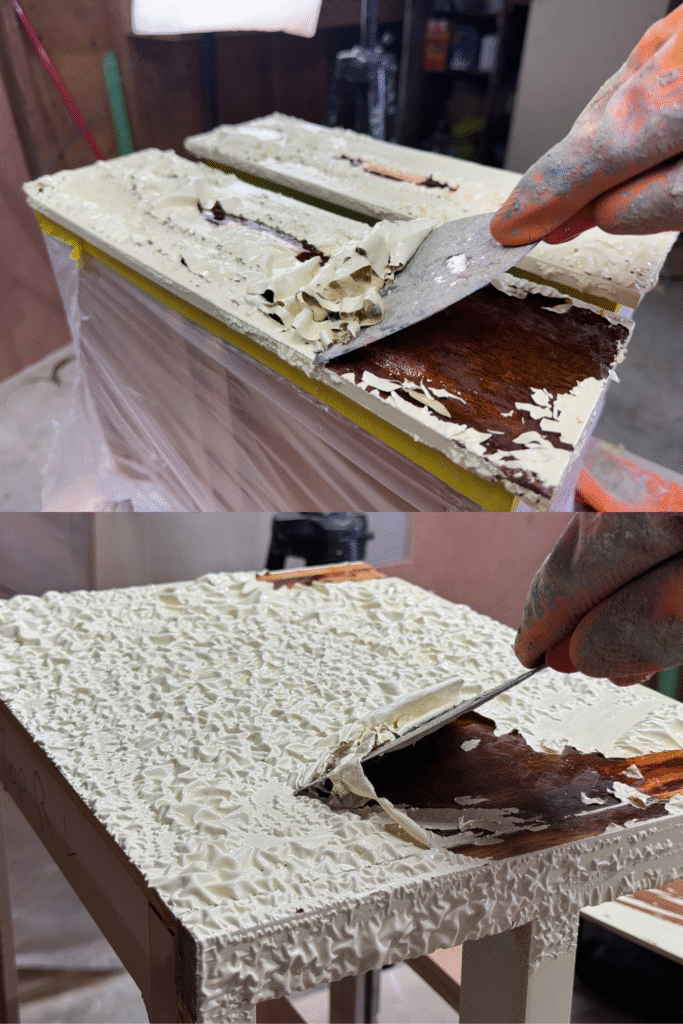
Quick Process: 1. Apply a thick coat 2. Let it sit 3. Use a scraper to gently lift the softened paint. For stubborn spots, repeat the process.
Paint strippers are one of the most common methods for removing paint from furniture. You’ve probably seen those short videos where paint just slides right off, making it look effortless. The truth? That’s rarely the case. Most of the time you’ll still have to put in some elbow grease, especially to get paint out of the grain, tight corners, or stubborn areas.
Strippers come in liquid, gel, and paste forms. They work by breaking down the bond between paint and wood, softening the finish so it can be scraped away. One thing to note: modern strippers are nowhere near as powerful as they used to be, especially against older, tougher paints.
I mostly use gel strippers on furniture and my go-to right now is Circa 1850. They have gel, liquid, and a mixed furniture option that’s not as thick as gel but also thicker than liquid. It works fast and does the job for me!
Here’s How I Use Paint Stripper on Furniture:
- Test first: Always try a small area to see if the stripper will actually lift the paint.
- Apply generously: If it works, coat a section heavily, I spread it with a chip brush.
- Let it sit: Wait until the paint wrinkles or bubbles. This can take 5 minutes to over an hour depending on the stripper, temperature, humidity, and paint type. Tip: cover the area with plastic wrap or a garbage bag to prevent the stripper from drying out (once dry, it stops working and needs reactivation).
- Scrape gently: Use a putty knife to lift and peel away the softened paint.
- Repeat if needed: Most pieces take more than one round before you’re down to bare wood.
- Note: If paint stripper is not successful I will usually scrape, then sand/pick away the paint.
Paint Stripper Clean Up Process:
Once you’ve used paint stripper, there’s always a cleanup process, don’t skip it as it can cause issues with your finish later on.. Follow the directions on your product label, but here’s what I often do:
-
Scrub with mineral spirits and a wire brush or steel wool to remove residue and paint from the grain.
-
Some strippers allow water cleanup or come with their own neutralizing solution.
| Pros of Paint Stripper | Cons of Paint Stripper |
|
|
Watch the video above where I show both paint stripper and a carbide scraper to remove paint from an MCM tallboy.
2. Scraping
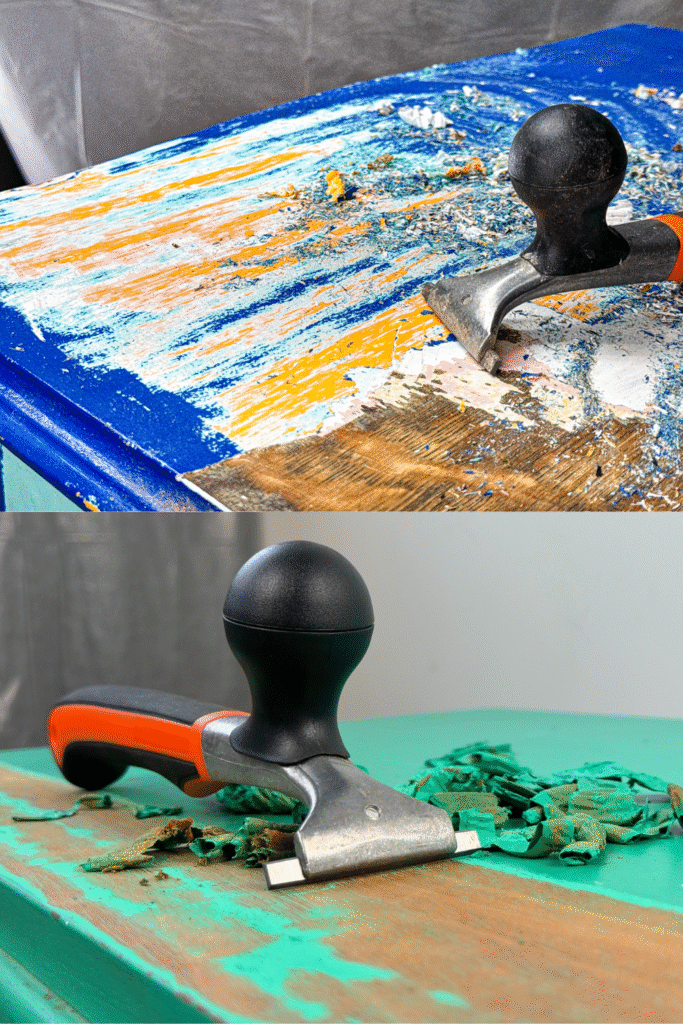
Quick Process: 1. Start scraping away layers of paint right away with the carbide scraper 2. take breaks and be careful not to gouge wood 3. use contour scrapeer for rounded or detailed areas
Scraping is the most straightforward paint removal method, you’re simply using a scraper tool to physically lift paint off the surface. With each stroke, you remove a layer, working your way back to the wood.
My go-to is the Bahco carbide scraper set, hands-down the best on the market for furniture work. They offer a 2-inch, 2.5-inch, and even a compact 1-inch pocket scraper. Honestly, I recommend having all three if you plan on working on painted furniture regularly, because each size comes in handy.
Tips for Using Carbide Scrapers:
-
Watch the corners: The sharp edges of the blade can gouge the wood if you dig in too hard.
-
Veneer caution: Be extra gentle along veneer edges, they can chip or lift quickly under pressure.
-
Mind the fibers: Carbide scrapers don’t just pull paint, they can also shave off wood fibers if you’re not careful.
-
Take breaks: Scraping is tiring. Fatigue makes it easier to slip, which risks damaging the wood or even cutting yourself.
Another favorite is the contour scraper tool. It comes with interchangeable tips shaped for different profiles, rounded, angled, and triangle-tipped. This makes it perfect for furniture with carved details or rounded edges that a flat scraper can’t reach.
| Paint Scraping Pros: | Paint Scraping Cons: |
|
|
3. Sanding

Quick Process: 1. Choose the right sander, I recommend a random orbital for stripping. 2. Only sand if the piece is solid wood, not veneer 3. Start with 60–120 grit sandpaper (or sanding mesh) 4. Switch to finer grits for smoothing after paint is gone
Sanding can be an effective way to remove paint, but you need to know what you’re working with. If your piece is veneered, avoid sanding as a paint removal method. Veneer is just a thin decorative layer of wood, and once it’s sanded through, you’re down to MDF or particleboard. I see this mistake all the time online, where people wonder why the “wood” disappeared after sanding and ask how to fix it… (you’d need to replace veneer).
If you’re working with solid wood, sanding is a safe option. That said, paint can sometimes gum up sandpaper and make the process frustrating. In those cases, I usually scrape first to take off the bulk of the paint, then sand the leftover bits.
4. Heat Gun
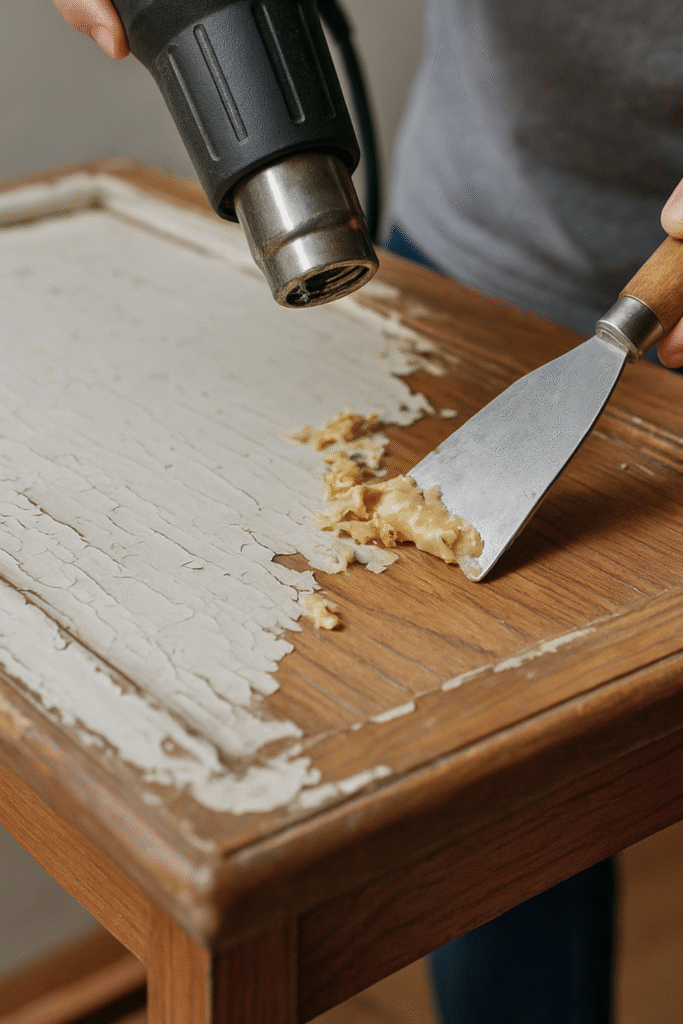
Quick Process: 1. Turn on the heat gun and let it warm up 2. Hold it a few inches away from the paint surface, always moving it around 3. As the paint bubbles, scrape it away with a putty knife or carbide scraper 4. Work in small sections and repeat until the bulk of the paint is removed
A heat gun uses high temperatures to soften paint so it bubbles and lifts from the wood. Once softened, you can scrape it away fairly easily. It’s an effective method, especially for stubborn paints that strippers or sanding alone won’t tackle.
The key to using a heat gun successfully is control. If you hold it in one spot too long, you risk scorching the wood beneath the paint. Old paints, especially ones with lead, can also release harmful fumes when heated, so this is one method where safety gear and ventilation are a must.
I like to use a heat gun for projects where no other method works.
| Heat Gun Pros: | Heat Gun Cons: |
|
|
5. Paint Picking
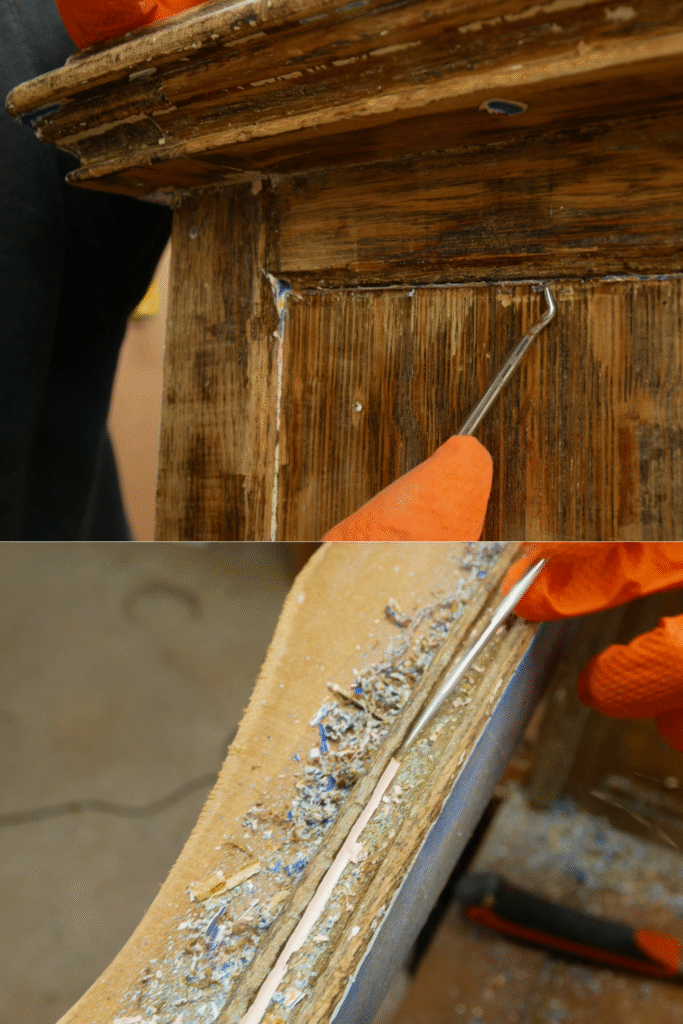
This one isn’t really a “method” on its own, but it’s almost always part of the process. No matter which paint removal method you use, there will be stubborn bits of paint left behind… deep in the grain, wedged in corners, or stuck in small gouges.
That’s where paint picking comes in. I keep a set of small dental-style tools on hand to dig paint out of those hard-to-reach spots. It’s tedious work, but it makes a huge difference in the final look of the piece. Nothing more annoying than staing wood and a bright white streak of paint is visible right in the center of the piece.
Think of this step as the detail cleanup that ties everything together before you sand smooth and prep for finishing.
Other Methods (Less Common)
Sand Blasting
Sand blasting (or media blasting) uses compressed air to shoot abrasive material at the paint surface. While it can strip paint quickly, it’s very aggressive and more commonly used on metal. Some professionals use softer media like walnut shells or soda on wood, but it’s risky since it can easily damage the grain.
Laser Paint Removal
Laser removal is a high-tech method where a focused laser burns away paint without harming the underlying wood. It’s mainly used for specialty restoration or museum-grade projects, since the equipment is extremely expensive and not practical for DIY furniture work. You may see people picking it up today more often, so it’s possible it will become a modern stripping method soon!
Final Thoughts
When it comes to removing paint from wood furniture, there’s no single “best” method, it really depends on your project and what type of paint or wood you’re dealing with.
In most cases, the most effective approach is a combination: start with a method that takes off the bulk of the paint, then switch to scraping, sanding, or picking for the details.
The key is patience. Paint removal takes time and usually a bit of trial and error, but the payoff is worth it. Done carefully, you’ll uncover some incredible wood that has been wanting to breathe for years!

